Wednesday, April 29, 2020

Docker Installation on Red Hat Linux 8 | Install Docker on Linux

Find steps for installing Docker on Red Hat Linux 8

Enable Docker Registry
sudo dnf config-manager --add-repo=https://download.docker.com/linux/centos/docker-ce.repo

Install Docker CE using dnf comman
sudo dnf list docker-ce
sudo dnf install docker-ce --nobest -y
sudo systemctl start docker

sudo systemctl enable docker

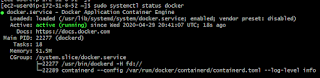
sudo systemctl status docker

docker --version

sudo docker run hello-world


Steps for installing Docker-compose

sudo curl -L "https://github.com/docker/compose/releases/download/1.23.2/docker-compose-$(uname -s)-$(uname -m)" -o /usr/local/bin/docker-compose

sudo chmod +x /usr/local/bin/docker-compose

docker-compose --version

Add the docker group to current user
sudo usermod -aG docker $USER

Logout and login again.

Monday, April 27, 2020

puppetserver ca list fatal error when running action 'list'

puppetserver ca list fatal error when running action 'list'

You need to add to puppet master ip address in /etc/hosts file

xxx.xx.xx.xx (IP of the puppet master) puppet

Sunday, April 26, 2020

How to install Puppet 6 on Ubuntu 18.0.4 | Puppet Master install Ubuntu 18.0.4 | Setup Puppet Master on Ubuntu

Puppet is an Infrastructure provisioning tool, similar to Ansible, Chef. We will see how to setup Puppet Master in Ubuntu 18.0.4


Pre-requistes:
Install Puppet master on new Ubuntu with medium instance
port 8140 needs to be opened.

Steps:
First let us see how to install Puppet 6.x on Ubuntu 18.0.4.

Steps for Puppet Master Installation
1. Modify Puppet Master Hosts file to add hostname of Puppet Master
sudo vi /etc/hosts

2. Download puppet installable

curl -O https://apt.puppetlabs.com/puppet6-release-bionic.deb
sudo dpkg -i puppet6-release-bionic.deb
sudo apt-get update
sudo apt-get install puppetserver -y
sudo ufw allow 8140
sudo systemctl enable puppetserver.service


(the above command is to start the service during starting the Ubuntu instance)
sudo systemctl start puppetserver.service           


(The above command is for starting the server and this may take some time)
sudo systemctl status puppetserver.service


Now press q to come out of window.
Add puppet master ip address and puppet next to it like shown below

This confirms that Puppet Master is installed successfully.

Verify which version of Puppet installed by executing below command:
apt policy puppetserver

2. you need to install the aws-sdk-core and retries gems as root (or superuser):
sudo /opt/puppetlabs/puppet/bin/gem install aws-sdk-core retries
Done installing documentation for retries after 0 seconds
6 gems installed
3. Also install AWS SDK for accessing resources in AWS
sudo /opt/puppetlabs/puppet/bin/gem install aws-sdk -v 2.0.42

Done installing documentation for retries after 0 seconds
4 gems installed
4. Now you can install puppet-labs-aws module
sudo /opt/puppetlabs/bin/puppet module install puppetlabs-aws

That's it. Puppet Master is setup successfully!!!! You can watch the above steps in YouTube as well.

Ansible playbook for Java 11 Installation on Ubuntu - Ansible Java 11 Playbook Ubuntu 22.0.4

1. Login to Ansible management server/machine. Create SSH keys in Ansible host machine by executing the below command: (if you already have keys created, please skip this step)
ssh-keygen 

enter three times..now you will see keys successfully created.
2.  Execute the below command on Ansible management node and copy the public key content:
sudo cat ~/.ssh/id_rsa.pub

copy the above output.
3. Now login to target node, execute the below command to open the file
sudo vi /home/ubuntu/.ssh/authorized_keys
type shift A and then enter now 
    and paste the key in the above file. please do not delete any existing values in this file.

4. Now go back to Ansible mgmt node, do changes in /etc/ansible/hosts file to include the node you will be installing software. Make sure you add public IP address of target node as highlighted below in red color:
sudo vi /etc/ansible/hosts
[My_Group]  
xx.xx.xx.xx ansible_ssh_user=ubuntu ansible_ssh_private_key_file=~/.ssh/id_rsa  ansible_python_interpreter=/usr/bin/python3

5. let's make sure Ansible Control node is able to connect to target node

ansible -m ping all

ansible all -a "whoami"


6. make changes in playbooks as given below,
cd ~/playbooks

sudo vi installJava11.yml

---
- hosts: My_Group
  tasks:
    - name: Task - 1 Update APT package manager repositories cache
      become: true
      apt:
        update_cache: yes
    - name: Task -2 Install Java using Ansible
      become: yes
      apt:
        name: "{{ packages }}"
        state: present
      vars:
        packages:
           - openjdk-11-jdk

6. Execute Ansible playbook
ansible-playbook installJava11.yml

now after successfully executing, enter below command to make sure Java is installed in target node:

java -version
openjdk version "11.0.7" 2020-04-14
OpenJDK Runtime Environment (build 11.0.7+10-post-Ubuntu-2ubuntu218.04)
OpenJDK 64-Bit Server VM (build 11.0.7+10-post-Ubuntu-2ubuntu218.04, mixed mode, sharing)

Saturday, April 25, 2020

How to install Terraform on Ubuntu 22.0.4 | TerraForm Installation on Ubuntu 22.0.4 | Setup Terraform on Ubuntu

Please find steps for installing Terraform on Ubuntu EC2. You can install Terraform on any of your existing Jenkins Ubuntu EC2 instances.


Terraform is used for provisioning infrastructure on Cloud. you don't need to create manually any resource in AWS.

Create a working directory
sudo mkdir -p /opt/terraform
cd /opt/terraform

Download Terraform from HasiCorp website
sudo wget https://releases.hashicorp.com/terraform/1.5.4/terraform_1.5.4_linux_386.zip

Install unzip utility
sudo apt-get install unzip -y

Unzip Terraform Zip file
sudo unzip terraform_1.5.4_linux_386.zip
 
Add terraform to PATH
sudo mv /opt/terraform/terraform /usr/bin/
 
Verify Terraform version
terraform -version
this should show version of Terraform.
 
Terraform v1.4.6


Thursday, April 23, 2020

Install Artifactory on Ubuntu - Setup Artifactory on Ubuntu - Install Artifactory 7.4.1 on Ubuntu 18.0.4 EC2 in AWS

Artifactory is one of the popular binary repository managers. It is Java based open source tool, used for storing artifacts. Artifactory can be used for storing Docker images as well.

Artifactory can be integrated with many Continuous integration and Continuous delivery tools. Artifactory is mainly used by Ant, Maven and Gradle build tools.

Let us see how to install Artifactory on Ubuntu 18.0.4.

Pre-requistes:
Install Artifactory on 2GM RAM, for AWS choose at least small or medium instance type.
Default ports 8081 and 8082 needs to be opened.
8081 for Artifactory REST APIs.
8082 for everything else (UI, and all other product’s APIs).

Update Ubuntu server
sudo apt-get update

Install Java Open JDK 11 package
sudo apt-get install default-jdk -y

Verify Java Version
java -version

Download Artifactory 
Add artifactory repository key and file to Ubuntu.
sudo wget -qO - https://api.bintray.com/orgs/jfrog/keys/gpg/public.key | sudo apt-key add - 

sudo add-apt-repository "deb [arch=amd64] https://jfrog.bintray.com/artifactory-debs $(lsb_release -cs) main"
Update the package
sudo apt-get update

Install Artifactory 
sudo apt install jfrog-artifactory-oss
The above message should confirm Artifactory have been successfully installed.
Now let us start Artifactory service.

Start Artifactory 
sudo systemctl start artifactory.service

Create symbolic link
sudo systemctl enable artifactory.service


Check whether Artifactory is running?
sudo systemctl status artifactory.service

Check if service is running locally on 8081 port
curl localhost:8081

Access Artifactory Web Interface
You should see Artifactory welcome page, Login with Username:  admin and Password: password 


After Login, click on Get started. Now reset admin password. enter as Admin123/Admin123

Skip for base URL and skip proxy setup, choose Generic and Maven
Click Next

That's it! Artifactory is setup successfully. Please watch the steps in details below in my YouTube channel:

Jenkins Artifactory Integration
Find steps involved in integrating Artifactory with Jenkins.

https://www.coachdevops.com/2020/04/integrate-artifactory-with-jenkins.html

Tuesday, April 21, 2020

How to perform git revert - revert to previous Git commit - Git Revert Examples

Git is popular distributed and open source version control systems. It is very easy to use. Let us see how can we revert to previous commit.

In order to demo this, I have created a sample repo in GitHub. You can clone it without using ssh keys. You can also try in your Sample Repo as well.

git clone https://github.com/akannan1087/myRepoForJavaApp.git

cd myRepoForJavaApp

First code commit
Let us create a text file called hello.txt
sudo vi hello.txt
Add one line like below
First commit!

git add hello.txt
git commit -m "making our first commit"
git push

you will see all commits with latest commit in the top.

Second code commit
sudo vi hello.txt
Add one line like below
First commit!
Second commit!

git add hello.txt
git commit -m "making our second commit"
git push

third code commit

sudo vi hello.txt
Add one line like below
First commit!
Second commit!
Third commit!!!

git add hello.txt
git commit -m "making our third commit"
git push

Try to view all commits in one line
git log --oneline

547d163 making our third commit
1ec0921 making our second commit
550095c making our first commit
1bad8df Update index.jsp
c206c37 Update index.jsp
161a241 Update index.jsp
5b4e649 my first project setup in GitHub
b429bb6 Initial commit

How to revert to first commit
Now let us say we want to revert to first commit # 550095c making our first commit

git checkout  550095c hello.txt

type git status

git commit -m "reverting to first commit"
git push

cat hello.txt

Please click here if you want to learn more about Git.

Saturday, April 18, 2020

Trigger Jenkins Job from Slack - How to Trigger Jenkins Build Job from Slack

Jenkins job can be triggered in many ways using poll SCM, webhooks. Well, you can also trigger a Jenkins job from Slack as well.  Let us see how to achieve that.


Pre-requistes:
1. Install build authorization token root plug-in under Manager Jenkins --> Manage Plug-ins
2. Make sure you have already created a channel in Slack.

Now let us look at the steps on how to trigger Jenkins Job from Slack channel:

Steps in Jenkins:

1. Go to Jenkins --> Click on the Job you would like to trigger from Slack --> Configure
Go to build triggers section.

We will be using the following URL to trigger builds from Slack
http://jenkins_dns_name/job/jobName/build?token=myToken

2. Go to Manage Jenkins --> Configure Global security, click on Allow anonymous read only access.
Apply, Save.

Steps in Slack:

1. Go to the channel from where you would like to trigger builds.
2. Channel settings --> Click on More --> Click Add apps
Type slash commands and add it

Click on view in app directory

Click on Add to Slack

Enter a command - single word something like /build (it should be one word no spaces or characters)

Click on Add Slash command integration
Enter Jenkins URL, like mentioned above -
http://jenkins_dns_name/job/jobName/build?token=myToken

Method as GET


and scroll down click on the check box like below

And click Save Integration

Go to channel, enter the command as shown below:
/build

and press enter

Now your Jenkins job should run instantly in Jenkins. 

You can watch this steps in my YouTube channel as well:

Thursday, April 16, 2020

How to install SonarQube on Ubuntu 16.0.4? Install Sonarqube on Ubuntu

SonarQube is one of the popular static code analysis tool. SonarQube is java based tool along with back end - back end can be MySQL, Oracle or PostgreSQL. We will use Postgres for set up on Ubuntu.
Please find steps for installing SonarQube on Ubuntu EC2. Make sure port 9000 is opened in security group(firewall rule).


Let us start with java install (skip java install if you already have it installed)

1. Java steps 

sudo apt-get update
sudo apt-get install default-jdk -y

Verify Java Version

java -version

openjdk version "1.8.0_191"
OpenJDK Runtime Environment (build 1.8.0_191-8u191-b12-2ubuntu0.16.04.1-b12)
OpenJDK 64-Bit Server VM (build 25.191-b12, mixed mode)

2. Postgres Installation

sudo sh -c 'echo "deb http://apt.postgresql.org/pub/repos/apt/ `lsb_release -cs`-pgdg main" >> /etc/apt/sources.list.d/pgdg.list'


sudo wget -q https://www.postgresql.org/media/keys/ACCC4CF8.asc -O - | sudo apt-key add -


sudo apt-get -y install postgresql postgresql-contrib


sudo systemctl start postgresql
sudo systemctl enable postgresql

Login as postgres user now
sudo su - postgres

Now create a user below
createuser sonar

Switch to sql shell by entering
psql


Execute the below three lines (one by one)

ALTER USER sonar WITH ENCRYPTED password 'password';
CREATE DATABASE sonar OWNER sonar;
\q


type exit to come out of postgres user.


3. Now install SonarQube Web App
sudo wget https://binaries.sonarsource.com/Distribution/sonarqube/sonarqube-6.4.zip

sudo apt-get -y install unzip
sudo unzip sonarqube-6.4.zip -d /opt


sudo mv /opt/sonarqube-6.4 /opt/sonarqube -v


Modify sonar.properties file
sudo vi /opt/sonarqube/conf/sonar.properties
uncomment the below lines by removing # and add values highlighted yellow
sonar.jdbc.username=sonar
sonar.jdbc.password=password


Next, uncomment the below line, removing #
sonar.jdbc.url=jdbc:postgresql://localhost/sonar


Press escape, and enter :wq! to come out of the above screen.

Create Sonar as a service
Execute the below command:
sudo vi /etc/systemd/system/sonar.service


add the below code in green color:
[Unit]
Description=SonarQube service
After=syslog.target network.target

[Service]
Type=forking

ExecStart=/opt/sonarqube/bin/l
inux-x86-64/sonar.sh start
ExecStop=/opt/sonarqube/bin/li
nux-x86-64/sonar.sh stop

User=root
Group=root
Restart=always

[Install]
WantedBy=multi-user.target


sudo systemctl enable sonar
sudo systemctl start sonar
sudo systemctl status sonar
type q now to come out of this mode.
Now execute the below command to see if Sonarqube is up and running. This may take a few minutes.

tail -f /opt/sonarqube/logs/sonar.log

Make sure you get the below message that says sonarqube is up..
Now access sonarQube UI by going to browser and enter public dns name with port 9000

Click here to learn how to integrate SonarQube with Jenkins.

Please watch above steps in myYouTube video as well: