Friday, September 20, 2019

Create EC2 Instance - How to create EC2 instance in AWS console ?

Please follow the below steps to create an EC2 instance. EC2 instance is virtual server provided by AWS. We will be using this EC2 to install Java, Jenkins, Tomcat, Maven. We will be using this as a CI server.

Steps:

1: Go to AWS console. click on All services, Click on Compute -->  Click on EC2


2. Click on Launch instance. Choose an Amazon machine image (AMI), click next


3. select
Ubuntu Server 16.04 LTS (HVM), SSD Volume Type 


click next

4. choose an instance type as t2.small, 2GB memory. click next

5. Leave values to default in step 3 and step 4. click next


6. enter tag name in step 5. Click to add a Name tag. it can be something like JenkinsEC2. click next:configure Security Group


7. Click create new security group, give name as MyJenkinsSecurityGroup, add custom rule for 8080, 8090 , allow 0.0.0.0/0 as source IP


8. Click on Review and launch


Click on Launch

09. Choose the existing key pair if you have one, otherwise create new one, give some name as my2020EC2Key. Make sure you download the key. Please do not give any space or any character in naming the key.


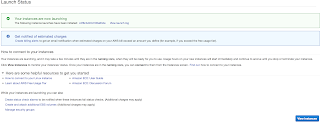
10. Click on launch instance, Scroll down and click on view instances.


Once instance is created. you can see it running..


How to connect to EC2 using Git bash in Windows or iTerm in Mac? 

http://www.cidevops.com/2018/02/how-to-connect-to-ec2-instance-from.html

1. go to Downloaded location private key in your local machine.
2. Copy the url from Ec2 console by selecting the instance, click on actions, connect.Please use the below link to connect to EC2 from your local machine:

Jenkins setup - Install Java, Jenkins, Maven, Tomcat on Ubuntu EC2 - How to install Java, Jenkins, Maven, Tomcat on Ubuntu EC2

Please follow steps to install Java, Jenkins, Maven, Tomcat on Ubuntu EC2. Jenkins is a java based application, so you need to install Java first. 

Java Setup on Ubuntu

sudo apt-get update

Install Java Open JDK 8 package

sudo apt-get install default-jdk -y


Once install java, enter the below command

Verify Java Version

java -version

openjdk version "1.8.0_191"
OpenJDK Runtime Environment (build 1.8.0_191-8u191-b12-2ubuntu0.16.04.1-b12)
OpenJDK 64-Bit Server VM (build 25.191-b12, mixed mode)

Now lets do Jenkins installation

Jenkins Setup

Add Repository key to the system

wget -q -O - https://pkg.jenkins.io/debian/jenkins-ci.org.key | sudo apt-key add -
Append debian package repo address to the system

echo deb http://pkg.jenkins.io/debian-stable binary/ | sudo tee /etc/apt/sources.list.d/jenkins.list

sudo apt-get update
Install Jenkins
sudo apt-get install jenkins -y


The above screenshot should confirm that Jenkins is successfully installed.

Access Jenkins in web browser

Now Go to AWS console.
  Click on EC2, click on running instances link. Select the checkbox of EC2 you are installing Java and Jenkins.

  Click on Action.
  Copy the value from step 4 that says --> Connect to your instance using its Public DNS


Now go to browser. enter public dns name or public IP address with port no 8080.This is how to select public DNS name:


Unlock Jenkins
You may get screen, enter the below command in Git bash( Ubuntu console)
Get the password from the below file

sudo cat /var/lib/jenkins/secrets/initialAdminPassword

Copy the password and paste in the browser

Click on install suggested plug-ins.
Also create user name and password.
enter everything as admin. at least user name as admin password as admin
Click on Save and Finish. Click on Start to Use.

Maven
sudo apt install maven -y

you can type mvn --version
you should see the below output.


Tomcat Installation

Tomcat is a web server or web container where java web application can be deployed by developers.

sudo apt-get update
sudo apt-get install tomcat8 -y


sudo apt-get install tomcat8-docs tomcat8-examples tomcat8-admin -y


sudo cp -r /usr/share/tomcat8-admin/* /var/lib/tomcat8/webapps/ -v

Click on this link to know how to make changes using Vi editor.


Change port no from 8080 to 8090

sudo vi /var/lib/tomcat8/conf/server.xml


you need to scroll down by clicking down arrow button in this file change the port no from 8080 to 8090 at line starting with <Connector port="8080" protocol="HTTP/1.1"

setup an user in tomcat 

sudo vi /var/lib/tomcat8/conf/tomcat-users.xml
Scroll down all the way to the end of the file,
Add the below lines in second last line above (above </tomcat-users>)
<role rolename="manager-script"/>

<user username="tomcat" password="password" roles="manager-script"/>


Add more memory to JVM
sudo vi /etc/default/tomcat8

Look for the line starting JAVA_OPTS and comment that line by adding #.
Add the below line:
JAVA_OPTS="-Djava.security.egd=file:/dev/./urandom -Djava.awt.headless=true -Xmx512m -XX:MaxPermSize=512m -XX:+UseConcMarkSweepGC"

sudo systemctl restart tomcat8

sudo systemctl status tomcat8

you may get message that says tomcat is active running.
press q for quitting from that window.
Now go to browser, copy public DNS
http://Ec2_public_dns_name:8090
 
You should see a page that says.
It works!!!!

That's it. You have setup Jenkins and Tomcat successfully!!

Please watch here for live demo:

Thursday, September 19, 2019

Setup SSH Keys in BitBucket & Setup Java Web App in BitBucket

We will see how to setup Java Web App using Maven in BitBucket and also how to setup SSH keys in Bitbucket.

Pre-requisites:
If you don't have an bitbucket account, You need to create an account in bitbucket.org.
Implementation steps:

1. after login into bitbucket, click on + and Click on Create Repository


2. enter the repo name as MyBitbucketRepo, make sure it is private, Include read me option - choose yes with template. Click Git as version control system.
3. Click on create repository.
4. now click on your avatar (left bottom of the screen, BitBucket settings-> security--> ssh keys


5. now go to your laptop, open git bash for windows laptop or iTerm (for iMac laptop) and connect to Jenkins EC2 instance using Git bash. How to connect, refer this url - http://www.cidevops.com/2018/02/how-to-connect-to-ec2-instance-from.html
6. Now type  ssh-keygen (and then simply enter four times, do not give any password)


7. copy the content of public key executing below command in Gitbash.

sudo cat ~/.ssh/id_rsa.pub

8. go to click on Add key from step # 3,  and paste the content of public key. give some name as mySSH key. click on Add key.
9. Now click on repo you created in step # 1. Click on Clone and copy the SSH url. Do not select HTTPS Url. The url will be from your repo you created under Clone link. 
10. go back to Gitbash  windows connected to Jenkins EC2, execute the below command. Paste the SSH url you copied above.

git clone <ssh_url_from_bitbucket_repo_you_created>

   11. Now after cloning, type ls -al command
12. It will show a folder with repo name..
13. navigate to repo folder by below command:
    cd mybitbucketrepo
14. use below command to create Java project using Maven. Maven is the build for creating and building java projects.
mvn archetype:generate -DgroupId=com.mkyong -DartifactId=MyWebApp -DarchetypeArtifactId=maven-archetype-webapp -DinteractiveMode=false
15. type ls -al to see the new folder called MyWebApp
   16. type  below command to see the newly created project
git status


17. git add  *

18. Perform below command to commit the changes to local repository first.

git commit -m "my first project check-in to bitbucket"
19. Now perform below command to push from local repository to remote repository.

git push
Please watch here for live demo: