Showing posts with label Ubuntu. Show all posts

Sunday, October 8, 2023

How to Install JFrog Artifactory on Ubuntu | Setup JFrog Artifactory on Ubuntu | Install JFrog Artifactory 7.X on Ubuntu 22.0.4

Artifactory is one of the popular binary repository managers. It is Java based open source tool, used for storing build artifacts and docker images.

Some of the key features of Artifactory:
  • Supports 27 different package types including helm charts, docker images regardless of tech stack.
  • A single source of truth for all your binaries
  • Integration with all CICD tools
  • role based authorization with teams to manage artifacts 
  • you can create local, remote and virtual repositories


Artifactory can be integrated with many Continuous integration and Continuous delivery tools. Artifactory is mainly used by Ant, Maven and Gradle build tools. Let us see how to install Artifactory on Ubuntu 22.0.4 using Deb packages.

Pre-requisites:
  • VM needs to have at least 4GB RAM, for AWS choose at least medium instance type.
  • Default ports 8081 and 8082 needs to be opened. 8081 for Artifactory REST APIs. 8082 for everything else (UI, and all other product’s APIs).
Change Host Name to Artifactory
sudo hostnamectl set-hostname Artifactory

Update Ubuntu OS
sudo apt update

Add JFrog Artifactory APT repository
echo "deb https://releases.jfrog.io/artifactory/artifactory-debs xenial main" | sudo tee -a /etc/apt/sources.list.d/artifactory.list


Import repository GPG key by running the following commands
curl -fsSL  https://releases.jfrog.io/artifactory/api/gpg/key/public|sudo gpg --dearmor -o /etc/apt/trusted.gpg.d/artifactory.gpg

Update the package
sudo apt update

Install Artifactory
sudo apt install jfrog-artifactory-oss -y
The above message should confirm Artifactory have been successfully installed.
Now let us start Artifactory service.

Start Artifactory 
sudo systemctl start artifactory.service
Create symbolic link
sudo systemctl enable artifactory.service


Check whether Artifactory is running?
sudo systemctl status artifactory.service

Press q to quit 

You can also check the logs

sudo tail -f /var/opt/jfrog/artifactory/log/artifactory-service.log


Check if service is running locally on 8081 port

curl localhost:8081

Access Artifactory App
Go to browser and open public IP/DNS name along with port no:8081
http://your_public_dns_name:8081

You should see Artifactory welcome page, login with default username and password which is
admin/password


After Login, click on Get started. 

Now reset admin password. enter as Admin1234/Admin1234

Skip for base URL and skip proxy setup
Click Next, click on Finish


That's it! Artifactory is setup successfully.

How to Integrate Artifactory and Jenkins?
https://www.coachdevops.com/2020/04/integrate-artifactory-with-jenkins.html

You can watch the steps in details on our YouTube channel:
  

Monday, April 10, 2023

Provision Ubuntu 22.0.4 EC2 Instance | How to create EC2 instance in AWS console | Launch Ubuntu 22.0.4 instance in AWS

How to create new EC2 instance in AWS console using new UI experience?

What is EC2 instance? 

It is virtual server provided by AWS. We will be using this EC2 to setup both Jenkins and Tomcat. Please follow the below steps to create an EC2 instance.

Watch in YouTube for a demo:

Steps:
1: Login to AWS console by clicking this link -->  https://aws.amazon.com/console/
click on All services, Click on Compute -->  Click on EC2


2. Click on Launch instance


3. Enter Name as EC2 and enter 2 as number of instances (one for Jenkins and another for Tomcat)


4. Select Ubuntu

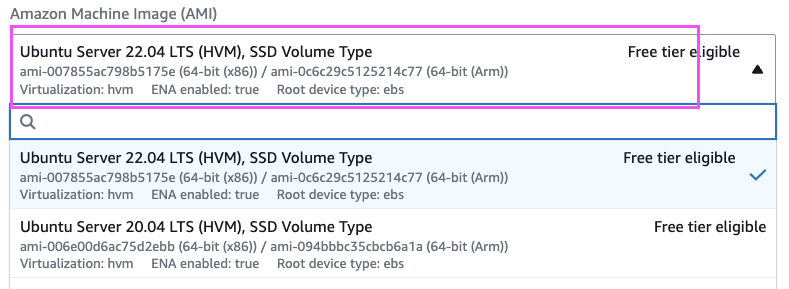
 and choose Ubuntu server 22.0.4 as AMI


5. Enter t2.small as instance type
6. Click on Create new Key Pair


7. Choose the existing key pair if you have one, otherwise create new one, give some name as myJenkinsKey. Make sure you download the key in your local machine. Please do NOT give space or any character while naming the key.


8. Under Network settings, Click Edit


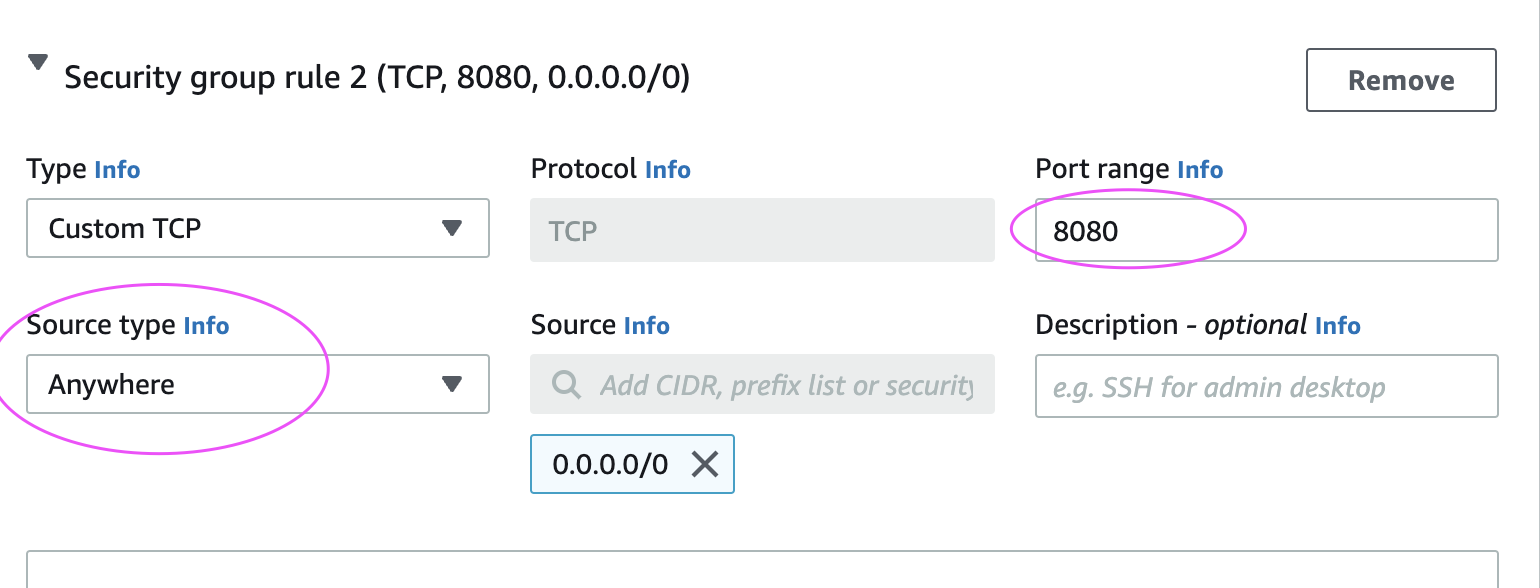
Add port range as 8080 and select AnyWhere as Source Type, that should enter 0.0.0.0/0 as Source

9. Configure Storage
Enter 15 GB as root volume 


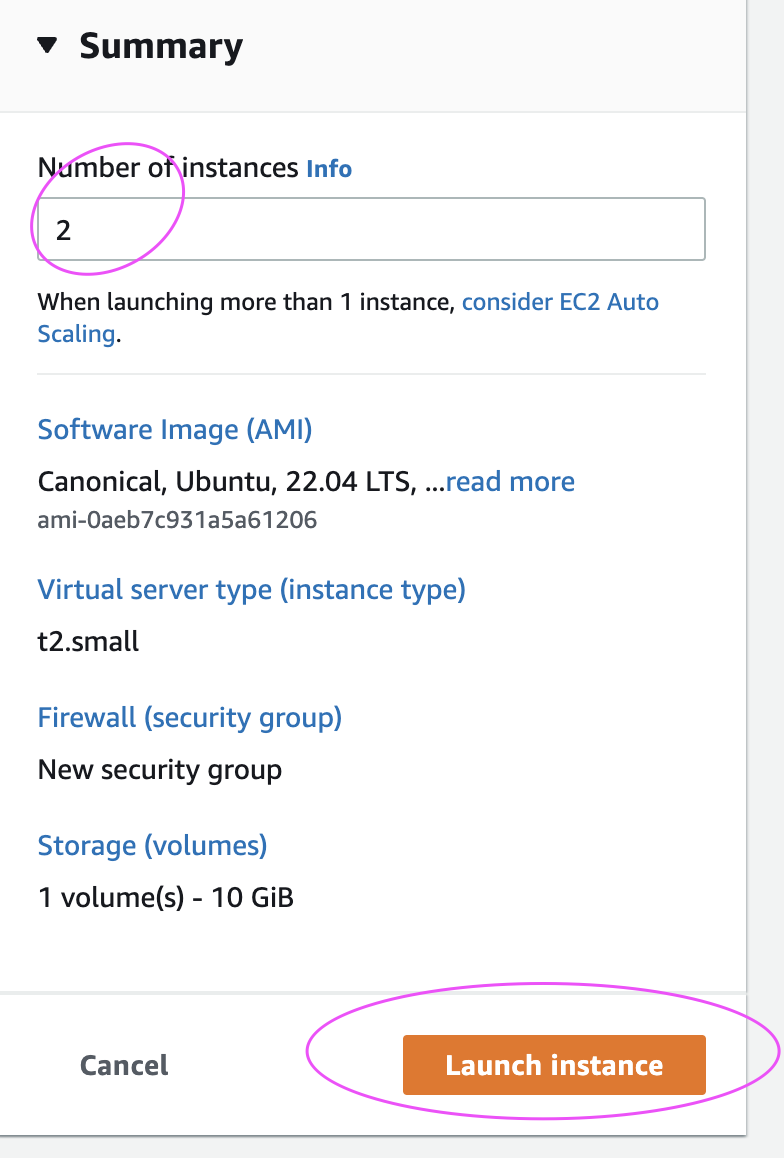
And then make sure in Summary, values appear as below:


10. Click on Launch Instance.

Click on View instances

Now you should be able to view instances in AWS console. Now you can re-name as Jenkins-EC2 and Tomcat-EC2


Connect to EC2 instance from local machine:
Please click the below link to understand the steps for connecting to EC2 instance from your local machine - windows or Apple laptop.

http://www.cidevops.com/2018/02/how-to-connect-to-ec2-instance-from.html

Wednesday, April 5, 2023

SonarQube Server Cannot be reached Error Resolution | SonarQube Troubleshooting | Fix for max virtual memory areas vm.max_map_count [65530] is too low

 How to Resolve SonarQube Server cannot be reached Error?

Pre-requisites:

refer this page for pre-requisites to install SonarQube


Resolution:

Make sure EC2 instance or server where you are installing SonarQube has enough virtual memory and open file limits for  Linux OS.

How to change default value for vm.max_map_count temporarily
sudo sysctl vm.max_map_count=262144
sudo sysctl fs.file-max=65536
The above command will load the max_map_count values and open file limits till the next system restart.

How to update vm.max_map_count directly in sysctl.conf permanently
Login to instance where you will be installing SonarQube, perform the below command to configure virtual memory permanently for SonarQube to function:
sudo vi /etc/sysctl.conf

Add the following lines to the bottom of that file:

vm.max_map_count=262144
fs.file-max=65536

To make sure changes are getting into effect:
sudo sysctl -p

Make sure SonarQube is up and running by checking the logs
sudo docker-compose logs --follow


Once you see the message, that's it. SonarQube have been configured successfully. press control C and enter.

Watch Steps in YouTube channel: 

Wednesday, September 14, 2022

How To Setup Jenkins using BootStrap Scripts in AWS EC2 Instance while Launching | How to Run commands on your EC2 instance at launch


What is bootstrap script in aws?

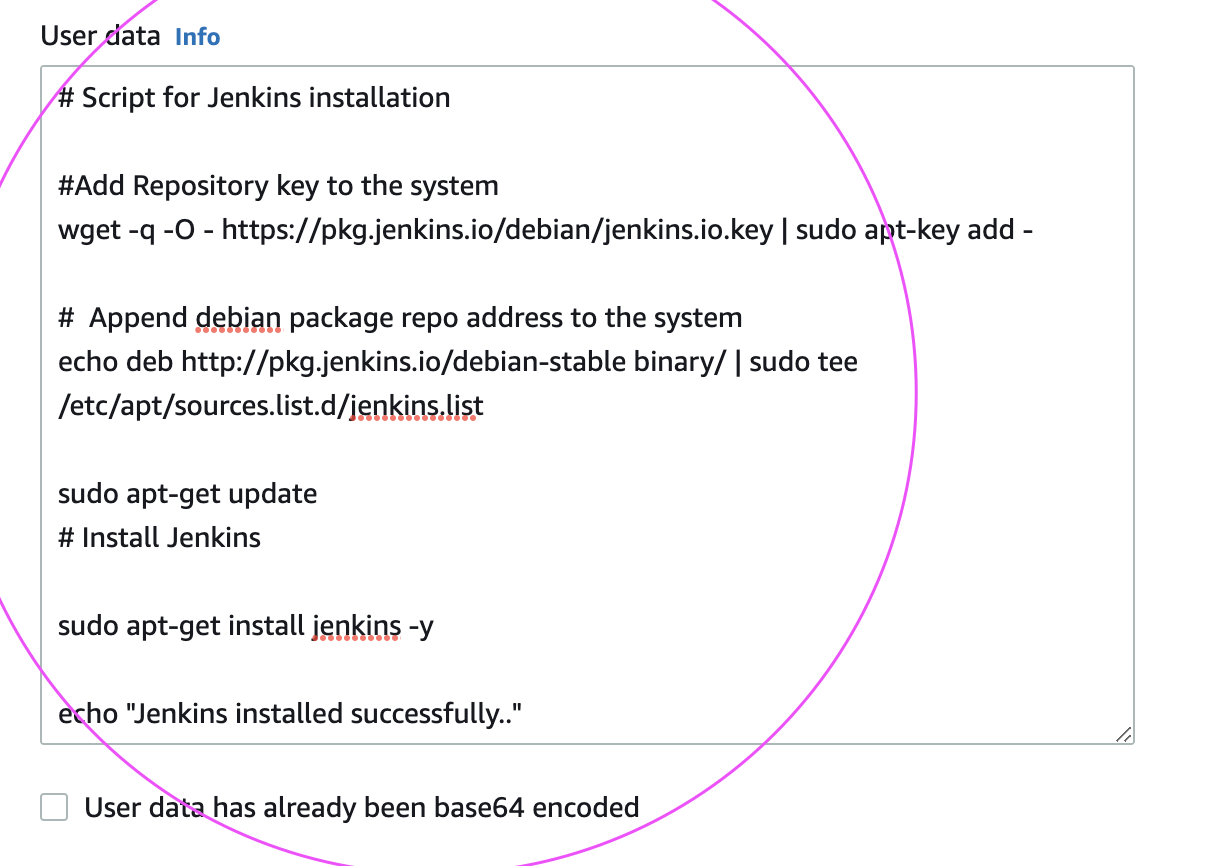
If you want to execute some commands during boot up(launch), you can execute it easily by loading script in user data section during EC2 launch. Bootstrap scripts run only once - when the instance is instantiated for the 1st time.

Please follow the below steps to create an EC2 instance.  We will be installing Java, Maven and Jenkins during boot up.

How to create EC2 instance in AWS console?

What is EC2 instance? 

It is virtual server provided by AWS. We will be using this EC2 to setup Jenkins. Please follow the below steps to create an EC2 instance.

Pre-requisites:

Steps:
1: Login to AWS console by clicking this link -->  https://aws.amazon.com/console/
click on All services, Click on Compute -->  Click on EC2


2. Click on Launch instance


3. Enter Name as Jenkins-EC2 and enter 1 as number of instance


4. Select Ubuntu and choose Ubuntu server 18.0.4 as AMI


5. Enter t2.small as instance type
6. You can choose existing Key
7. Under Network settings, Click Edit


Add port range as 8080 and select AnyWhere as Source Type, that should enter 0.0.0.0/0 as Source

8. Enter 10 GB as storage 

Steps to add bootstrap script during EC2 launch


Click on Advanced Details:

go to User Data section and Copy the script from this link.


9. Click on Launch Instance.

Click on View instances

Now you should be able to view instances in AWS console. 

once EC2 is provisioned, you can login and you will be able to see Java, Maven and Jenkins installed in EC2 instance after launch.

Check the Console Output Logs in EC2 instance

Login to EC2 instance, and type the below command:

tail -f /var/log/cloud-init-output.log

This will give the output of bootstrap execution

Verify if Java got installed.

java -version
mvn --version


Go to the browser and try to access Jenkins in the browser, Jenkins should be coming up.(make sure you open port 8080 in the firewall rules)


Enter Jenkins Admin password:
Execute below command to get Jenkins admin password

sudo cat /var/lib/jenkins/secrets/initialAdminPassword

Enter the password and click on continue

Click on Suggested plug-ins and setup the admin user for Jenkins.

Watch the steps in YouTube channel:


Friday, August 5, 2022

Install Jenkins using Docker | Run Jenkins using Docker Compose on Ubuntu 22.0.4 | Install Jenkins using Docker-Compose

Jenkins is an open source continuous integration/continuous delivery and deployment (CI/CD) automation software DevOps tool written in the Java programming language. It is used to implement CI/CD workflows, called pipelines.

How to setup Jenkins using Docker Compose?

Jenkins is Continuous integration server. It is open source and Java based tool. Jenkins can be setup using Docker Compose with less manual steps.


What is Docker Compose?
Compose is a tool for defining and running multi-container Docker applications. With Compose, you use a YAML file to configure your application’s services. Then, with a single command, you create and start all the services from your configuration. Since Docker Compose lets you configure related containers in a single YAML file, you get the same Infrastructure-as-Code abilities as Kubernetes. But they come in a simpler system that’s more suited to smaller applications that don’t need Kubernetes’ resiliency and scaling.
 
The purpose of docker-compose is to function as docker cli but to issue multiple commands much more quickly. To make use of docker-compose, you need to encode the commands you were running before into a docker-compose.yml file
 
Run docker-compose up and Compose starts and runs your entire app.

Pre-requisites:

  • New Ubuntu EC2 up and running with at least t2.small
  • Port 8080 is opened in security firewall rule
Perform system update
sudo apt update

Install Docker-Compose
sudo apt install docker-compose -y

Create docker-compose.yml
this yml has all configuration for installing Jenkins.
sudo vi docker-compose.yml 

(Copy the below code high-lighted in yellow color)
version: '3'
services:
  jenkins:
    image: jenkins/jenkins:lts
    restart: always
    privileged: true
    user: root
    ports:
      - 8080:8080
      - 50000:50000
    container_name: jenkins
    volumes:
      - /home/ubuntu/jenkins_compose/jenkins_configuration:/var/jenkins_home
      - /var/run/docker.sock:/var/run/docker.sock

Save the file by entering :wq!

Execute Docker compose command:
sudo docker-compose up -d 


Make sure Jenkins is up and running by checking the logs
sudo docker-compose logs --follow


Once you see the message, that's it. Jenkins is been installed successfully. press control C and enter.
Now access Jenkins UI by going to browser and enter public dns name with port 8080
Now to go to browser --> http://your_jenkins_publicdns_name:8080/

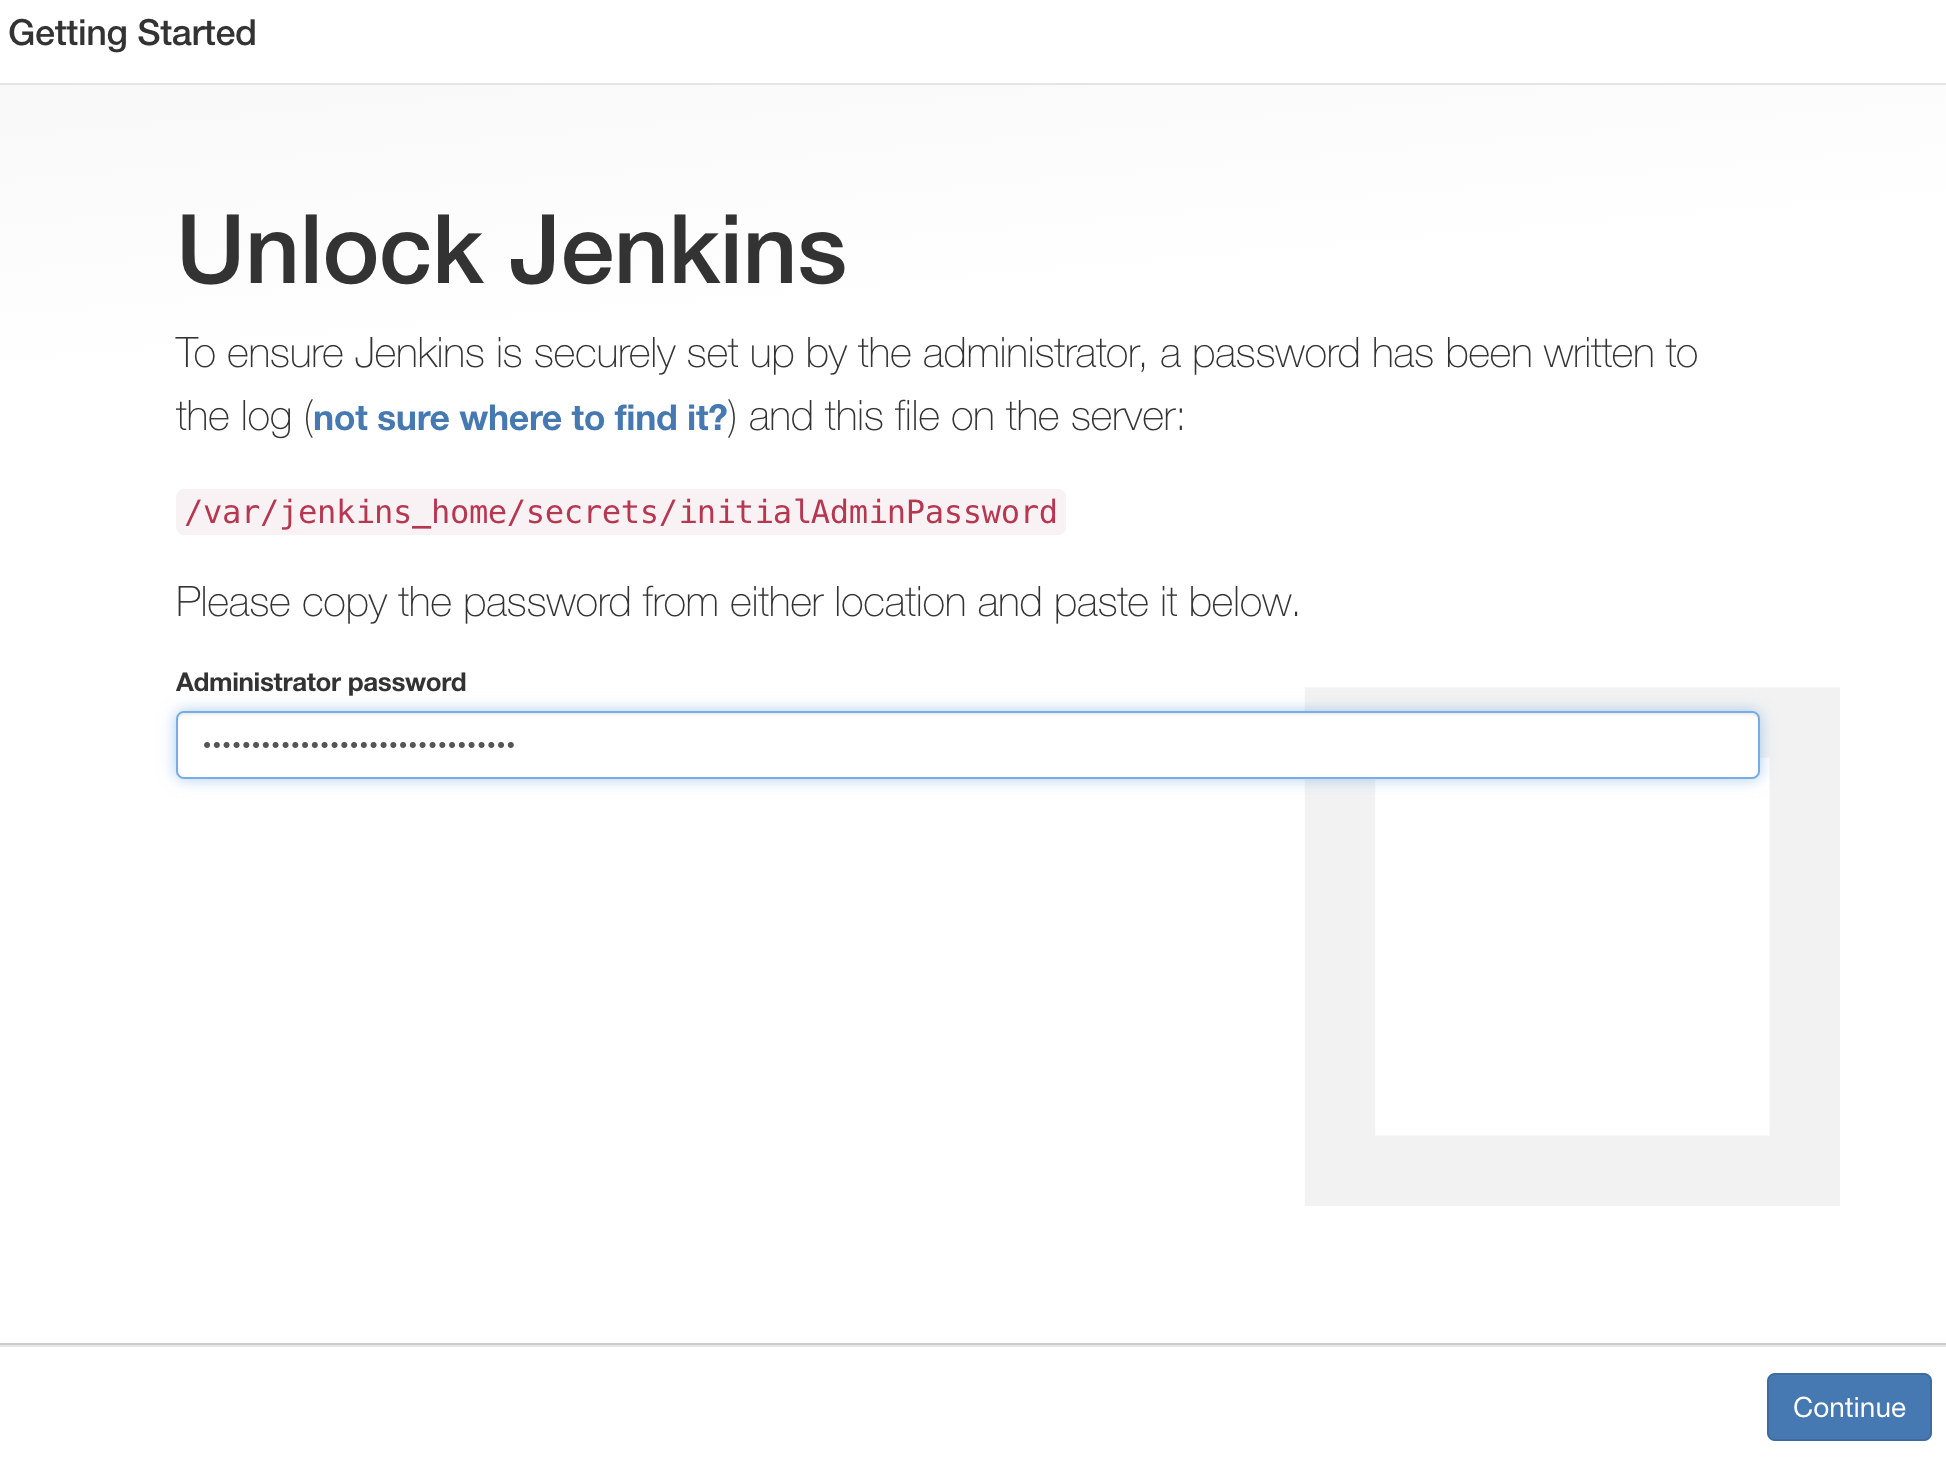
You can get the Admin password from above command as well.

Enter Admin Password

Enter the password and Click on continue.
Then click on install suggested plug-ins. 
Also create user name and password.
enter everything as admin. at least user name as admin password as admin
Click on Save and Finish. Click on start using Jenkins. Now you should see a screen like below:


That's it. You have setup Jenkins successfully using Docker Compose.

Click here to learn how to create a FreeStyle job in Jenkins to automate Build and Deployment of Java Web App.
Click here to learn how to create a Pipeline job in Jenkins to automate Build and Deployment of Java Web App.