Showing posts with label azure. Show all posts

Friday, March 22, 2024

How to Setup Self-Hosted Linux Docker Build Agent in Azure DevOps | How to configure Self-Hosted Linux Docker Agents in Azure Pipelines | Create Custom Build Agents in Azure DevOps

 Let us learn how to configure a self-hosted agent using Docker in Azure DevOps pipelines.

What is an Agent?

An agent is computing infrastructure with installed agent software that runs one job at a time.To build your code or deploy your software using Azure Pipelines, you need at least one agent. As you add more code and people, you'll eventually need more.

When your pipeline runs, the system begins one or more jobs. 


In Azure pipelines, there are two types of build agents:

  1. Microsoft-hosted agents - This is a service totally managed by Microsoft and it's cleared on every execution of the pipeline (on each pipeline execution, you have a fresh new environment).
  2. Self-hosted agents - This is a service that you can to set up and manage by yourself. This can be a custom virtual machine on Azure or a custom on-premise machine inside your infrastructure. In a self-hosted agent, you can install all the software you need for your builds, and this is persisted on every pipeline execution. A self-hosted agent can be on Windows, Linux, macOS, or in a Docker container.

You can set up a self-hosted agent in Azure Pipelines to run inside a Windows Server Core (for Windows hosts), or Ubuntu container (for Linux hosts) with Docker. We will learn in this article on how to host Ubuntu Docker container on Linux machines.

Pre-requisites:
How to configure Self-hosted docker build agent?

1. Go to Azure DevOps dashboard - https://dev.azure.com/
2. Select your project dashboard
3. Go to your project settings
4. Click on Agent pools


Create a new Agent pool name

Enter name as myAgentPool or any name
Make sure you select Grant access permission to all pipelines


Login to Azure VM where the docker build agents will be running.

Step #1 - Install Docker CLI so we can build docker image

sudo apt update && sudo apt install docker.io -y

Step #2 - Add logged in user to docker group
sudo usermod -a -G docker $USER

Step #3 - Clone repo which has Dockerfile

git clone https://github.com/akannan1087/ado-docker-agent-repo.git

Sample dockerfile is here.. please feel free to add any software in the docker agent.
FROM ubuntu:22.04

RUN apt update -y && apt upgrade -y && apt install curl git jq libicu70 maven -y

# Also can be "linux-arm", "linux-arm64".
ENV TARGETARCH="linux-x64"

WORKDIR /azp/

COPY ./start.sh ./
RUN chmod +x ./start.sh

# Create agent user and set up home directory
RUN useradd -m -d /home/agent agent
RUN chown -R agent:agent /azp /home/agent

USER agent
# Another option is to run the agent as root.
# ENV AGENT_ALLOW_RUNASROOT="true"

ENTRYPOINT ./start.sh

Step #4 - change directory
cd ado-docker-agent-repo/azp-agent-in-docker/

Step #5 - Build the Docker image
sudo docker build --tag "azp-agent:linux" --file Dockerfile .

Step #6: Run the agent as a container
Run the below command:

sudo docker run -e AZP_URL="https://dev.azure.com/your_org_name" -e AZP_TOKEN="XXXX" -e AZP_POOL=myAgentPool -e AZP_AGENT_NAME="myLinuxDockerBuildAgent" --name "azp-agent" azp-agent:linux

that's it, docker agent is successfully started.

Step #7: Verify if docker agent is running or not
Run the below command:
sudo docker ps


Check the status of build Agent
Click on agentPool name, click on Agents

This confirms that Build agent is successfully configured in Azure DevOps and is available to run builds.

How to use the Docker build agent in your pipelines?

Please use the docker agent in the classic pipeline like below: select the agentPool


run the job. now you can see the jobs under myAgentPool--> Jobs
 

Here is the sample pipeline YAML code for automating Maven build for a Java project:

trigger:
- main
pool:
name: myAgentPool
stages:
- stage: Build
displayName: Build stage
jobs:
- job: MavenPackageAndPublishArtifacts
displayName: Maven Package and Publish Artifacts
steps:
- task: Maven@3
displayName: 'Maven Package'
inputs:
mavenPomFile: 'MyWebApp/pom.xml'

References:

Watch steps in YouTube channel:

Monday, September 4, 2023

How to connect to Azure Virtual Machine from your local machine? | Connect to Azure VM from your local machine | Connect to Azure VM from your local machine

Let's learn how to connect to a Virtual machine running in Azure cloud from your local machine. Your local machine can be a Windows laptop or MacBook laptop.


Pre-requisites:

1. Keys(for e.g., yourkey.pem) already downloaded in your local machine, preferably in downloads folder.
2. Azure VM is up and running
3. SSH client - for Windows laptop, you need to install an SSH client such as Git bash or putty. You can download Git from this URL - https://git-scm.com/downloads. For Apple laptop you need to download iTerm from here.

Steps to connect to your Azure VM instance:

1. Go to Azure console --> https://portal.azure.com
2. Click on Virtual machines, click on VM
3. Click on connect


Choose Native SSH


Enter SSH key name in step # 3 in the screen


4. copy the values from step # 4

 
Copy the url from SSH which looks like below:

For e.g.
ssh -i myAzVMKey.pem azureuser@104.43.214.12

Watch steps in YouTube channel:

Windows Laptop instructions
5. Go to your local machine, Open Git Bash in Windows


make sure you are in downloads directory where your keys got downloaded. Type the below commands:

type below commands: 
pwd
this should tell you which directory you are and then navigate to downloads dir.

cd  ~/downloads 


Now copy the value from Example in the above screen

ssh -i myAzVMKey.pem azureuser@104.43.214.12

and then type enter, say yes and enter
now you should be in Azure cloud, screen should show something like this, It means you are successfully connected to VM instance running on Azure cloud. 


Mac Book Laptop or iMac Instructions

Open iTerm window, type the below command to go to downloads directory.
cd downloads


For few Mac laptops, it may add .txt in the end of pem file. in that case you need to remove .txt in the end


ssh -i myAzVMKey.pem azureuser@104.43.214.12

pwd
and then execute below command to make sure the keys have only read permissions.

chmod 400 *.pem

6. Paste the url from example highlighted above in step # 4.
ssh -i myAzVMKey.pem azureuser@104.43.214.12
7. type yes when it is asking to connect.
8. now you should be in Azure cloud, screen should show something like this, It means you are successfully connected to VM instance running on Azure cloud. 


Tuesday, February 14, 2023

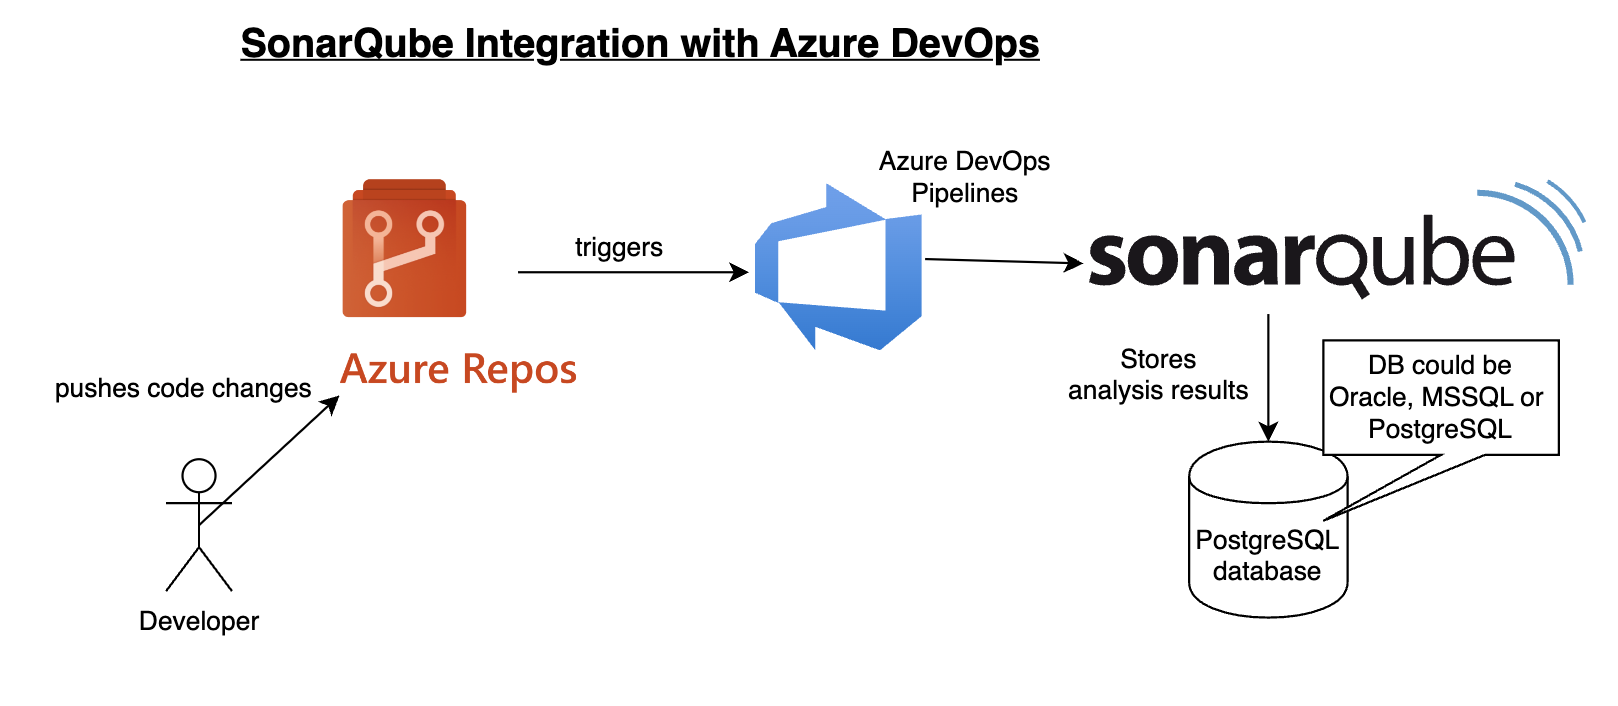
How to Integrate SonarQube with Azure DevOps | SonarQube Integration with Azure DevOps | Perform Code Scan using SonarQube In Azure Pipelines

Please find steps below for integrating SonarQube with Azure DevOps, Previously known as Visual Studio Team Services:


Pre-requisites:

https://marketplace.visualstudio.com/acquisition?itemName=SonarSource.sonarqube


Once added SonarQube plug-in, click on proceed to Organization..


Watch Steps in YouTube channel:

How to integrate SonarQube with Azure DevOps:

Create Token in SonarQube to authenticate with Azure DevOps
You need to login to SonarQube using your admin password. admin/admin123 and click on Admin on your top side.
Click on My Account, Security. 
Under Tokens, Give some value for token name and choose Global analysis token, click on generate Tokens. Copy the token value generated.


Create Service Connections in Azure DevOps 

Login to Azure DevOps. Select your project dashboard.


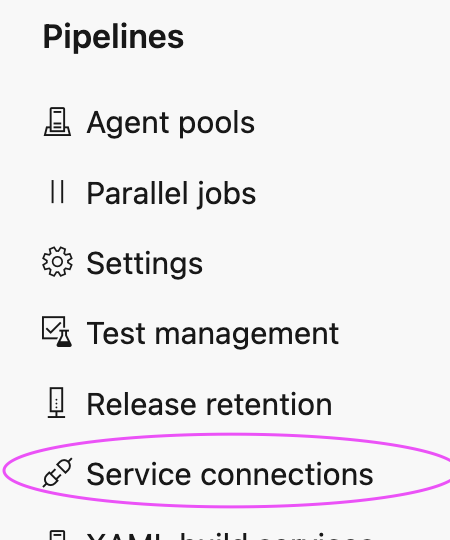
Click on Project settings --> Service connections


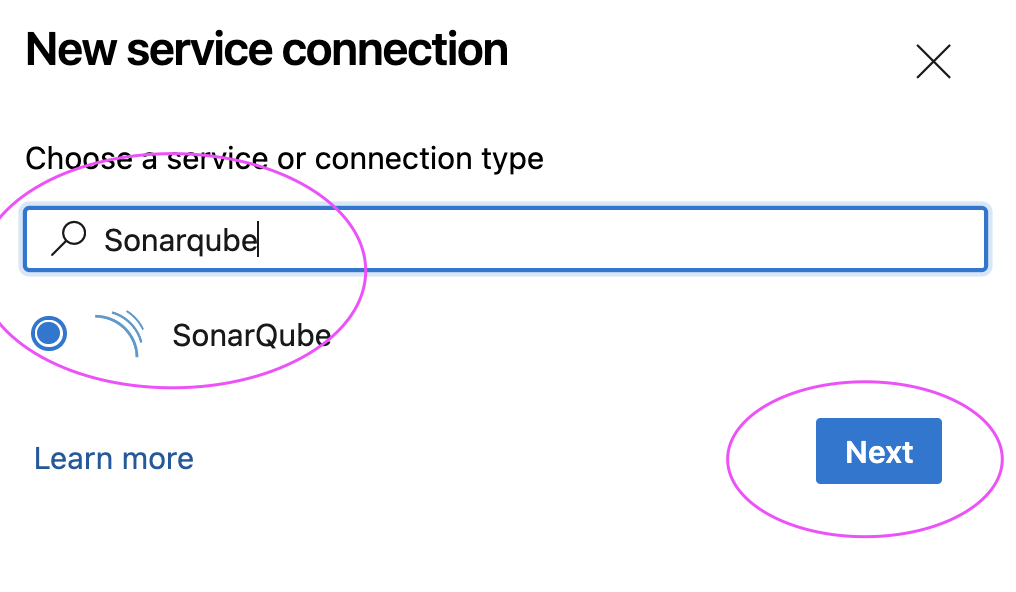
click on New service connection

Type SonarQube and Click Next

Enter SonarQube server url and enter Token created 
Give name for service connection and select Grant access permission to all pipelines.
Click on Save.

Create a Pipeline in Azure DevOps

1. Login to Azure DevOps. Go to Azure Pipelines. Click on create a new pipeline, use classic editor 
Select your Azure Repos
Type Maven and choose maven template as shown below


2. Click on Add tasks
3. Type Sonar


4. Add Prepare Analysis on SonarQube task
5. move up this task to all the way up.
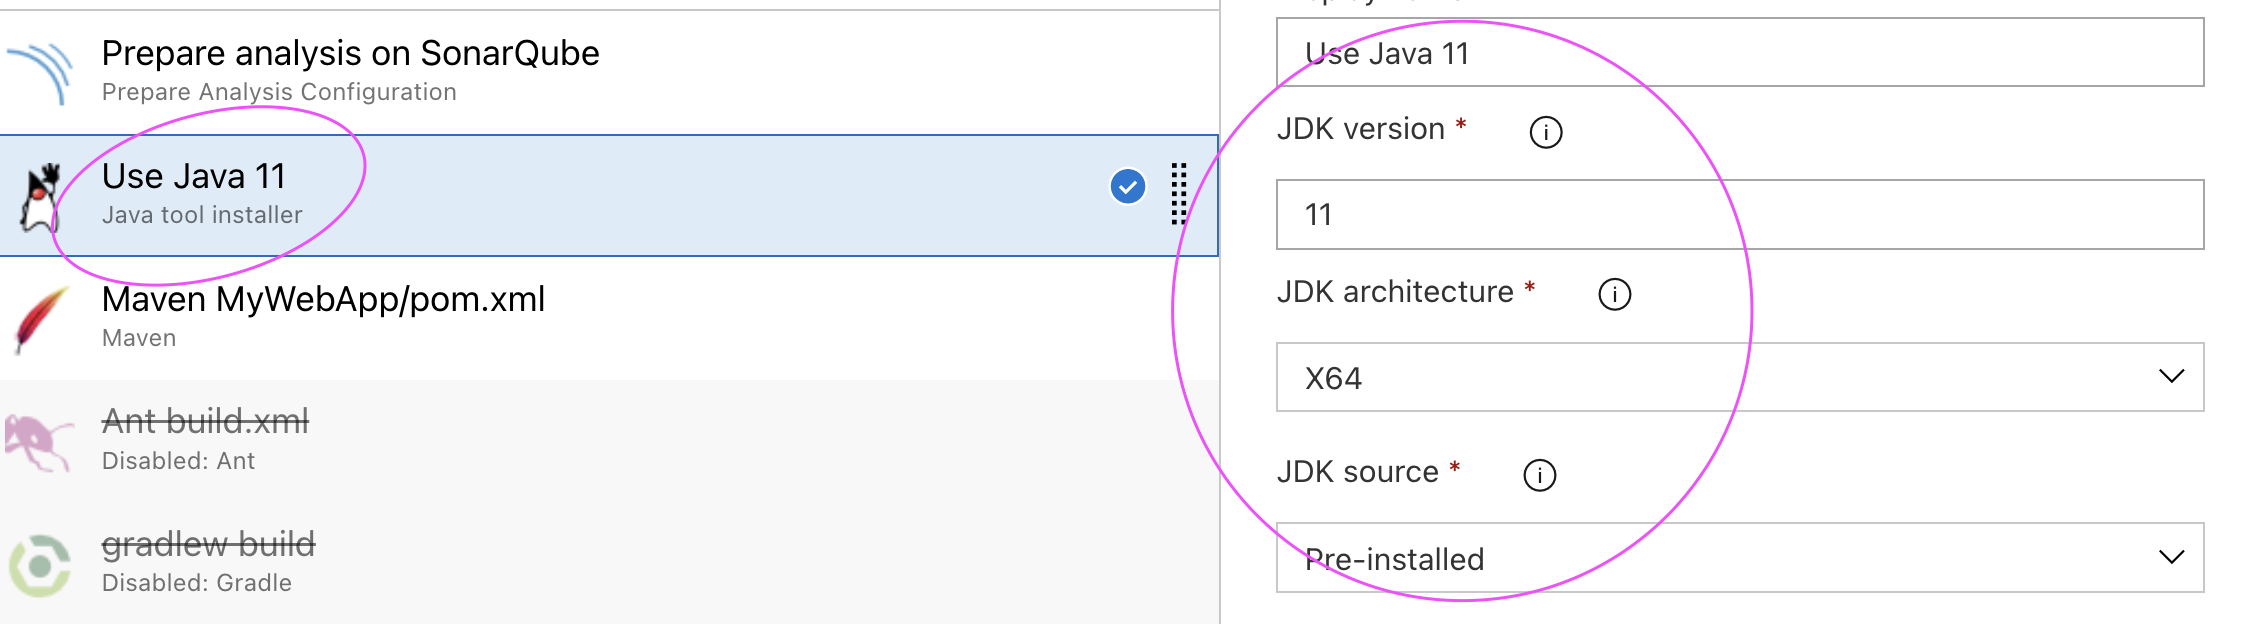
And also search for Java tool installer task and add it


It should be like shown below:


6. Click on prepare sonar analysis configuration task

select Integrate with Maven or Gradle option

7.Click on Java tool installer and change to 11 instead of 8


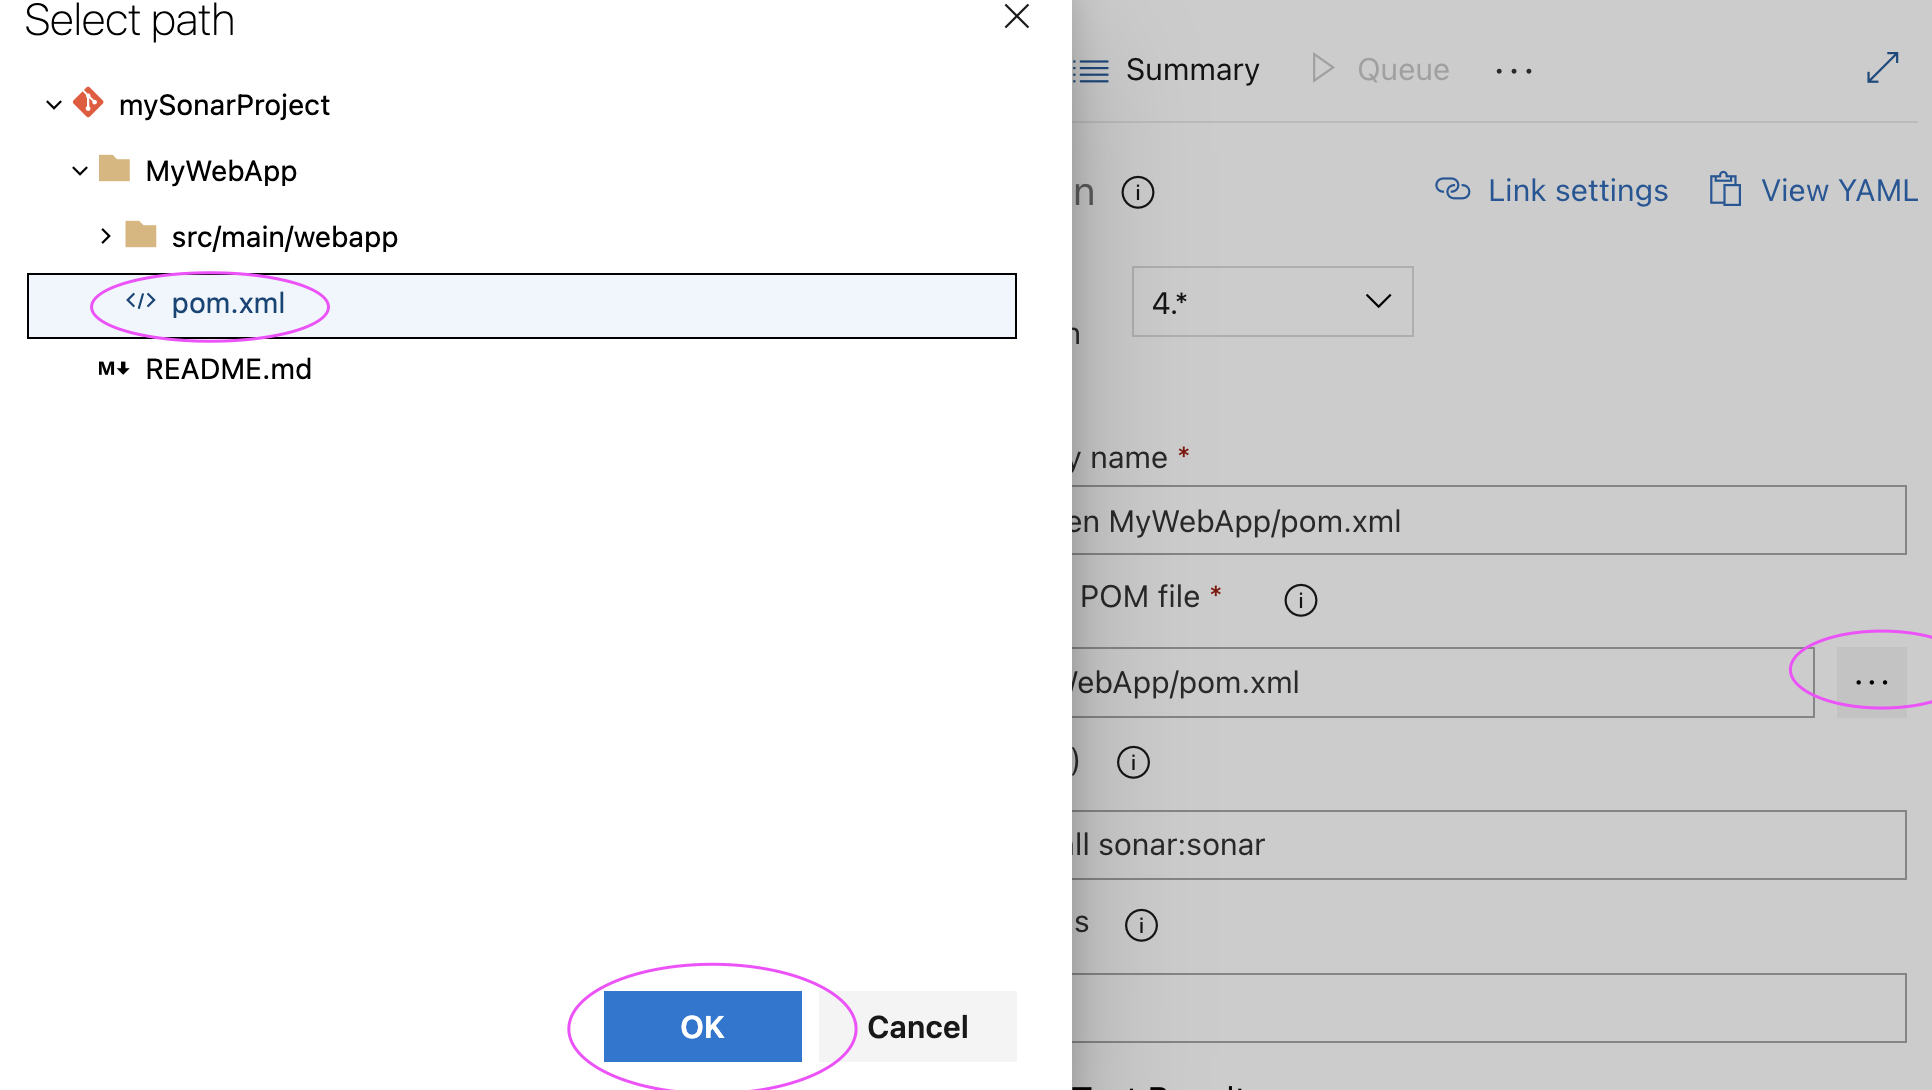
8. Edit maven task & add install sonar:sonar and also select the path of pom.xml under MyWebApp/pom.xml


Click on Save and Queue to kick start build.
9. Now login to SonarQube dashboard, click on Projects


Thursday, February 9, 2023

How to create Azure Resources using Terraform in Azure Cloud | Automate Infrastructure setup using Terraform in Azure Cloud | Create Azure WebApp using Terraform

Azure Web App service lets us quickly build, deploy, and scale enterprise-grade web, mobile, and API apps running on any platform. It supports .NET, .NET core, Java, PHP,  Python, Ruby and NodeJS. It is a fully managed Platform as a Serice (PaaS) where developers can deploy mobile, API apps or web applications in Azure Cloud in matter of seconds.

We will provision WebApp in Azure cloud using Terraform.

Terraform is an open-source tool for provisioning and managing cloud infrastructure. Terraform can provision resources on any cloud platform. 

Terraform allows you to create infrastructure in configuration files(tf files) that describe the topology of cloud resources. These resources include virtual machines, storage accounts, and networking interfaces. The Terraform CLI provides a simple mechanism to deploy and version the configuration files to Azure.

Pre-requisites:

Azure CLI needs to be installed.

Terraform needs to be installed.

How to Authenticate with Azure?

Terraform can authenticate with Azure in many ways, in this example we will use Azure CLI to authenticate with Azure and then we will create resources using Terraform.

Logging into the Azure CLI

Login to the Azure CLI using:

az login

The above command will open the browser and will ask your Microsoft account details. Once you logged in, you can see the account info by executing below command:

az account list

Now create a directory to store Terraform files.

mkdir azure-terraform

cd azure-terraform

Let's create a terraform file to use azure provider. To configure Terraform to use the Default Subscription defined in the Azure CLI, use the below cod.

sudo vi azure.tf

terraform {
  required_providers {
    azurerm = {
      source  = "hashicorp/azurerm"
      version = "=3.42.0"
    }
  }
}

# Configure the Microsoft Azure Provider
provider "azurerm" {
  features {}
}

Now initialize the working directory

Perform the below command:

terraform init

Once directory is initialized, you can start writing code for setting up the infrastructure. 

Create WebApp(App Service) using Terraform script

sudo vi create-app-svc.tf

# Create a resource group
resource "azurerm_resource_group" "dev-rg" {
  name     = "dev-environment-rg"
  location = "Central US"
}

# Create app service plan
resource "azurerm_service_plan" "service-plan" {
  name = "simple-service-plan"
  location = azurerm_resource_group.dev-rg.location
  resource_group_name = azurerm_resource_group.dev-rg.name
  os_type = "Linux"
  sku_name = "S1"
  tags = {
    environment = "dev"
  }
}

# Create Web App service for hosting Java Web App in Tomcat server
resource "azurerm_linux_web_app" "app-service" {
  name = "mysuperjavawebapp2"
  location = azurerm_resource_group.dev-rg.location
  resource_group_name = azurerm_resource_group.dev-rg.name
  service_plan_id = azurerm_service_plan.service-plan.id

        site_config {
        always_on          = true
          application_stack {
             java_server         = "TOMCAT"
             java_server_version = "8.5"
             java_version        = "11"
         }
        }
tags = {
    environment = "dev"
  }
}

Now Perform the below command to validate terraform files.

terraform validate

perform plan command to see how many resources will be created.

terraform plan

terraform apply --auto-approve

 
Now Login into Azure Cloud to see all the resources created.
 

To clean up the resources created from Terraform

terraform destroy --auto-approve