Showing posts with label Pipeline. Show all posts

Friday, March 22, 2024

How to Setup Self-Hosted Linux Docker Build Agent in Azure DevOps | How to configure Self-Hosted Linux Docker Agents in Azure Pipelines | Create Custom Build Agents in Azure DevOps

 Let us learn how to configure a self-hosted agent using Docker in Azure DevOps pipelines.

What is an Agent?

An agent is computing infrastructure with installed agent software that runs one job at a time.To build your code or deploy your software using Azure Pipelines, you need at least one agent. As you add more code and people, you'll eventually need more.

When your pipeline runs, the system begins one or more jobs. 


In Azure pipelines, there are two types of build agents:

  1. Microsoft-hosted agents - This is a service totally managed by Microsoft and it's cleared on every execution of the pipeline (on each pipeline execution, you have a fresh new environment).
  2. Self-hosted agents - This is a service that you can to set up and manage by yourself. This can be a custom virtual machine on Azure or a custom on-premise machine inside your infrastructure. In a self-hosted agent, you can install all the software you need for your builds, and this is persisted on every pipeline execution. A self-hosted agent can be on Windows, Linux, macOS, or in a Docker container.

You can set up a self-hosted agent in Azure Pipelines to run inside a Windows Server Core (for Windows hosts), or Ubuntu container (for Linux hosts) with Docker. We will learn in this article on how to host Ubuntu Docker container on Linux machines.

Pre-requisites:
How to configure Self-hosted docker build agent?

1. Go to Azure DevOps dashboard - https://dev.azure.com/
2. Select your project dashboard
3. Go to your project settings
4. Click on Agent pools


Create a new Agent pool name

Enter name as myAgentPool or any name
Make sure you select Grant access permission to all pipelines


Login to Azure VM where the docker build agents will be running.

Step #1 - Install Docker CLI so we can build docker image

sudo apt update && sudo apt install docker.io -y

Step #2 - Add logged in user to docker group
sudo usermod -a -G docker $USER

Step #3 - Clone repo which has Dockerfile

git clone https://github.com/akannan1087/ado-docker-agent-repo.git

Sample dockerfile is here.. please feel free to add any software in the docker agent.
FROM ubuntu:22.04

RUN apt update -y && apt upgrade -y && apt install curl git jq libicu70 maven -y

# Also can be "linux-arm", "linux-arm64".
ENV TARGETARCH="linux-x64"

WORKDIR /azp/

COPY ./start.sh ./
RUN chmod +x ./start.sh

# Create agent user and set up home directory
RUN useradd -m -d /home/agent agent
RUN chown -R agent:agent /azp /home/agent

USER agent
# Another option is to run the agent as root.
# ENV AGENT_ALLOW_RUNASROOT="true"

ENTRYPOINT ./start.sh

Step #4 - change directory
cd ado-docker-agent-repo/azp-agent-in-docker/

Step #5 - Build the Docker image
sudo docker build --tag "azp-agent:linux" --file Dockerfile .

Step #6: Run the agent as a container
Run the below command:

sudo docker run -e AZP_URL="https://dev.azure.com/your_org_name" -e AZP_TOKEN="XXXX" -e AZP_POOL=myAgentPool -e AZP_AGENT_NAME="myLinuxDockerBuildAgent" --name "azp-agent" azp-agent:linux

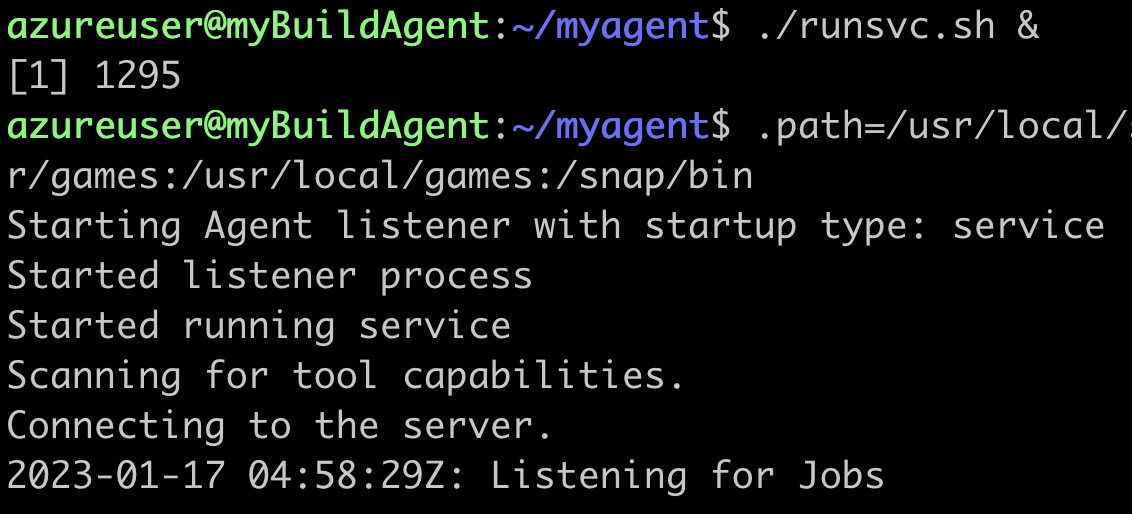
that's it, docker agent is successfully started.

Step #7: Verify if docker agent is running or not
Run the below command:
sudo docker ps


Check the status of build Agent
Click on agentPool name, click on Agents

This confirms that Build agent is successfully configured in Azure DevOps and is available to run builds.

How to use the Docker build agent in your pipelines?

Please use the docker agent in the classic pipeline like below: select the agentPool


run the job. now you can see the jobs under myAgentPool--> Jobs
 

Here is the sample pipeline YAML code for automating Maven build for a Java project:

trigger:
- main
pool:
name: myAgentPool
stages:
- stage: Build
displayName: Build stage
jobs:
- job: MavenPackageAndPublishArtifacts
displayName: Maven Package and Publish Artifacts
steps:
- task: Maven@3
displayName: 'Maven Package'
inputs:
mavenPomFile: 'MyWebApp/pom.xml'

References:

Watch steps in YouTube channel:

Friday, January 27, 2023

How to Setup Self Hosted Linux Agent in Azure DevOps | How to configure Self Hosted Agent for Azure Pipelines | Create Build Agent in Azure Cloud

Let us learn how to create and configure a Self-Hosted Agent in Azure DevOps (ADO).

What is an Agent?

An agent is computing infrastructure with installed agent software that runs one job at a time.

To build your code or deploy your software using Azure Pipelines, you need at least one agent. As you add more code and people, you'll eventually need more.

When your pipeline runs, the system begins one or more jobs. 


In Azure pipelines, there are two types of build agents:

  1. Microsoft-hosted agents - This is a service totally managed by Microsoft and it's cleared on every execution of the pipeline (on each pipeline execution, you have a fresh new environment).
  2. Self-hosted agents - This is a service that you can to set up and manage by yourself. This can be a custom virtual machine on Azure or a custom on-premise machine inside your infrastructure. In a self-hosted agent, you can install all the software you need for your builds, and this is persisted on every pipeline execution. A self-hosted agent can be on Windows, Linux, macOS, or in a Docker container.
Pre-requisites:

Watch Steps in YouTube channel:

How to configure Self-hosted build agent?

1. Go to Azure DevOps dashboard - https://dev.azure.com/
2. Select your project dashboard
3. Go to your project settings
4. Click on Agent pools


Create a new Agent pool name

Enter name as Ubuntu18-VM-Pool or any name
Make sure you select Grant access permission to all pipelines
click on Ubuntu18-VM-Pool, Agents, New agent


Click on Linux

Note down the steps to configure Linux build agent.
Login to your Azure VM now.

Step #1 - Create the Agent
mkdir myagent && cd myagent

Step #2 - Download the agent
wget https://vstsagentpackage.azureedge.net/agent/2.214.1/vsts-agent-linux-x64-2.214.1.tar.gz


Step #3 - Configure the Agent
tar zxvf vsts-agent-linux-x64-2.214.1.tar.gz


List the files in the directory after extracting.
ls -al


Step #4:
Run the below command:
./config.sh


Accept the Team Explorer Everywhere license agreement now?
Type Y and enter
Step #5:
Enter server URL >
https://dev.azure.com/{yourorganization}

Step #6:
Enter authentication type (press enter for PAT) > PAT

Step #7:
Enter personal access token, generated from this step

Step #8:
Enter Agent pool
Give some name

Step #9:
Enter Agent name --> myBuildAgent_1

Step #10:
Enter work folder > enter

that's it agent is successfully configured.

Configure the Agent to run as a Service

sudo ./svc.sh install &

Execute now to run as a service
./runsvc.sh &

Check the status of build Agent
Click on Ubuntu-18-VM pool name
Click on Agents

This confirms that Build agent is successfully configured in Azure DevOps and is available to run builds.

Steps for removing Agent from the agent pool
Remove the service first
sudo ./svc.sh uninstall


./config.sh remove

To Perform Java related builds on this Agent, make sure you install Java and Maven on this VM.

Install Java 11
sudo apt-get install default-jdk -y

Maven Installation
Maven is a popular build tool used for building Java applications. Please click here to learn more about Maven. You can install Maven by executing below command:

sudo apt update && sudo apt install maven -y

Check if Maven got installed

mvn --version

Friday, May 8, 2020

How to create declarative pipeline - Jenkins pipeline as code | How to create Jenkinsfile

Please find steps below for configuring Declarative Pipeline - Pipeline as a code - Jenkinsfile.

Pre-requistes:

1. Project setup in Bitbucket/GitHub/GitLab
2. Jenkins and Tomcat (web container) set up.
3. Maven installed in Jenkins
4. Sonarqube is setup and integrated with Jenkins
5. Artifactory configured and integrated with Jenkins
6. Slack channel configured an integrated with Jenkins

Install below Jenkins plug-ins

  • Pipeline stage view
  • Deploy to container
  • Slack,
  • Jacoco
  • Nexus Artifact Uploader
  • SonarQube

Create Jenkinsfile (pipeline code) to your MyWebApp

Step 1

Go to GitHub and choose the Repo where you setup MyWebApp in Lab exercise # 2

Step 2
Click on create new file.

Step 3 - Enter Jenkinsfile as a file name
Step 4

Copy and paste the below code and make sure what ever is highlighted in red color needs to be changed per your settings.

That's it. Pipeline as a code - Jenkinsfile is setup in GitHub.

rtMaven = null
server= null
pipeline {
  agent any

  tools {
    maven 'Maven3'
  }
  stages {
    stage ('Build') {
      steps {
      sh 'mvn clean install -f MyWebApp/pom.xml'
      }
    }
    stage ('Code Quality') {
      steps {
        withSonarQubeEnv('SonarQube') {
        sh 'mvn -f MyWebApp/pom.xml sonar:sonar'
        }
      }
    }
    stage ('JaCoCo') {
      steps {
      jacoco()
      }
    }
    stage ('Artifactory Upload') 
{
      steps {
        script {
          server = Artifactory.server('My_Artifactory')
          rtMaven = Artifactory.newMavenBuild()
          rtMaven.tool = 'Maven3'
          rtMaven.deployer releaseRepo: 'libs-release-local', snapshotRepo: 'libs-snapshot-local', server: server
          rtMaven.resolver releaseRepo: 'libs-release', snapshotRepo: 'libs-snapshot', server: server
          rtMaven.deployer.deployArtifacts = false // Disable artifacts deployment during Maven run
          buildInfo = Artifactory.newBuildInfo()
          rtMaven.run pom: 'MyWebApp/pom.xml', goals: 'install', buildInfo: buildInfo
          rtMaven.deployer.deployArtifacts buildInfo
          server.publishBuildInfo buildInfo
        }
      }
    }
    stage ('DEV Deploy') {
      steps {
      echo "deploying to DEV Env "
      deploy adapters: [tomcat8(credentialsId: '268c42f6-f2f5-488f-b2aa-f2374d229b2e', path: '', url: 'http://localhost:8090')], contextPath: null, war: '**/*.war'
      }
    }
    stage ('Slack Dev Notification') {
      steps {
        echo "deployed to DEV Env successfully"
        slackSend(channel:'your slack channel_name', message: "Job is successful, here is the info - Job '${env.JOB_NAME} [${env.BUILD_NUMBER}]' (${env.BUILD_URL})")
      }
    }
    stage ('QA Approve') {
      steps {
        echo "Taking approval from QA manager"
        timeout(time: 7, unit: 'DAYS') {
        input message: 'Do you want to proceed to QA Deploy?', submitter: 'admin,manager_userid'
        }
      }
    }
    stage ('QA Deploy') {
      steps {
        echo "deploying to QA Env "
        deploy adapters: [tomcat8(credentialsId: '268c42f6-f2f5-488f-b2aa-f2374d229b2e', path: '', url: 'http://your_dns_name:8090')], contextPath: null, war: '**/*.war'
        }
    }
    stage ('Slack QA Notification') {
      steps {
        echo "Deployed to QA Env successfully"
        slackSend(channel:'your slack channel_name', message: "Job is successful, here is the info - Job '${env.JOB_NAME} [${env.BUILD_NUMBER}]' (${env.BUILD_URL})")
      }
    }
  }
}

Step 5
That's it. Pipeline as a code - Jenkinsfile is setup in GitHub.

Click on commit to save into GitHub.

Create Pipeline and Run pipeline from Jenkinsfile

1. Login to Jenkins
2. Click on New item, give some name and choose Pipeline and say OK


3. Under build triggers, choose Poll SCM,
Enter H/02 * * * *


4. Under Pipeline section. click on choose pipeline script from SCM

5. Under SCM, choose Git


6. Enter HTTPS URL of repo and choose credentials - enter user name/password of GitHub.
Script path as Jenkinsfile

7. Click on Apply and Save
8. Click on Build now.

You should see pipeline running and application is deployed to Tomcat.

Thursday, May 16, 2019

Install JFrog Artifactory on Ubuntu - Artifactory install Ubuntu using Docker

Artifactory is one of the popular Binary repository manager. It is Java based tool, used for storing artifacts. Artifactory can be integrated with many Continuous integration and Continuous delivery tools. Artifactory is mainly used by Ant, Maven and Gradle build tools.

Let us see how to configure Artifactory on Ubuntu 16.0.4 using Docker. We will configure Artifactory by doing the three steps:

1. Install Docker on Ubuntu 16.0.4
2. Download Artifactory image
3. Spin up a container using the Artifactory image 

1. Install Docker on Ubuntu

Install packages to allow apt to use a repository over HTTPS:

sudo apt -y install apt-transport-https ca-certificates curl software-properties-common

Add Docker’s official GPG key:
curl -fsSL https://download.docker.com/linux/ubuntu/gpg | sudo apt-key add -

Add stable repository:
sudo add-apt-repository "deb [arch=amd64] https://download.docker.com/linux/ubuntu $(lsb_release -cs) stable"

Install Docker CE:
sudo apt update && sudo apt -y install docker-ce

If you would like to use Docker as a non-root user, you should now consider adding your user to the “docker” group with something like:
sudo usermod -aG docker $USER

Run the command below to see a version of docker installed.
docker version
 Client:
 Version:           18.09.6
 API version:       1.39
 Go version:        go1.10.8
 Git commit:        481bc77
 Built:             Sat May  4 02:35:27 2019
 OS/Arch:           linux/amd64
 Experimental:      false

Step 2: Download Artifactory Docker image

There are different editions of JFrog Artifactory available, let us use open source version.

Pull the latest Docker image of JFrog Artifactory.
sudo docker pull docker.bintray.io/jfrog/artifactory-oss:latest

Display docker images
sudo docker images

Step 3: Create Data Directory

Create data directory on host system to ensure data used on container is persistent.
sudo mkdir -p /jfrog/artifactory
sudo chown -R 1030 /jfrog/

Step 4: Start JFrog Artifactory container

To start an Artifactory container, use the command:
sudo docker run --name artifactory -d -p 8081:8081 \
 -v /jfrog/artifactory:/var/opt/jfrog/artifactory \
   docker.bintray.io/jfrog/artifactory-oss:latest
 

Step 5: Run Artifactory as a service

sudo vim /etc/systemd/system/artifactory.service
 
# Copy the below code highlighted in green 
[Unit]
Description=Setup Systemd script for Artifactory Container
After=network.target

[Service]
Restart=always
ExecStartPre=-/usr/bin/docker kill artifactory
ExecStartPre=-/usr/bin/docker rm artifactory
ExecStart=/usr/bin/docker run --name artifactory -p 8081:8081 \
  -v /jfrog/artifactory:/var/opt/jfrog/artifactory \
  docker.bintray.io/jfrog/artifactory-oss:latest
ExecStop=-/usr/bin/docker kill artifactory
ExecStop=-/usr/bin/docker rm artifactory

[Install]
WantedBy=multi-user.target 

Reload Systemd
sudo systemctl daemon-reload

Then start Artifactory container with systemd.
sudo systemctl start artifactory
 
Enable it to start at system boot.
sudo systemctl enable artifactory

Check whether Artifactory is running?
sudo systemctl status artifactory

Step 6: Access Artifactory Web Interface

http://server_url:8081/artifactory

You should see Artifactory welcome page.


Thursday, May 2, 2019

Jenkins Pipelines Tutorial | Pipeline as a code - Difference between Scripted, Declarative and Multibranch Pipelines

Jenkins is an open-source automation server used to build, test, and deploy software continuously.

Jenkins support various source code management, build, and delivery tools. Jenkins is #1 Continuous integration tool, especially new features like Jenkins Pipelines (Scripted and Declarative Pipeline) makes the delivery process very easy and help Team to adopt DevOps easily.


Jenkins pipeline

- Pipelines are better than freestyle jobs, you can write a lot of complex tasks using pipelines when compared to Freestyle jobs.
- You can see how long each stage takes time to execute so you have more control compared to freestyle.
- Pipeline is groovy based script that have set of plug-ins integrated for automating the builds, deployment and test execution.
- Pipeline defines your entire build process, which typically includes stages for building an application, testing it and then delivering it.
- You can use snippet generator to generate pipeline code for the stages you don't know how to write groovy code.
- Pipelines are two types - Scripted pipeline and Declarative pipeline

Jenkins Pipeline execution engine supports two DSL syntaxes: Scripted Pipeline and Declarative Pipeline.

Type of Jenkins Pipelines
  1. Scripted pipeline
  2. Declarative pipeline
 Scripted pipeline

- Scripted pipeline is traditional way of writing pipeline using groovy scripting in Jenkins UI.
- stricter groovy syntax
- each stage can not be executed in parallel in multiple build agents(Slaves) that easily.
- Code is defined within a node block

// Scripted pipeline
node {
  stage('Build') {
       echo 'Building....'
  }
  stage('Test') {
      echo 'Building....'
  }
  stage('Deploy') {
      echo 'Deploying....'
  }
}


Declarative Pipeline (Jenkinsfile)

- New feature added to Jenkins where you create a Jenkinsfile and check in as part of SCM such as Git.
- simpler groovy syntax
- Code is defined within a 'pipeline' block
- each stage can be executed in parallel in multiple build agents(Slaves)

// Declarative pipeline
pipeline {
  agent { label 'slave-node' }
  stages {
    stage('checkout') {
      steps {
        git 'https://bitbucket.org/myrepo''
      }
    }
    stage('build') {
      tools {
        gradle 'Maven3'
      }
      steps {
        sh 'mvn clean test'
      }
    }
  }
}