Monday, January 3, 2022

Install SonarQube using Docker | Install SonarQube using Docker on Ubuntu 18.0.4 | Install SonarQube using Docker-Compose

How to setup SonarQube using Docker and Docker compose?

SonarQube is static code analyis tool. It can be installed quickly using Docker with less manual steps.

Pre-requistes:

  • Ubuntu EC2 up and running with at least t2.small
  • Port 9000 is opened in security firewall rule
  • Make sure maximum number of 

sudo vi /etc/sysctl.conf

Add the following lines to the bottom of that file:

vm.max_map_count=262144
fs.file-max=65536

To make sure changes are getting into effect:

sudo sysctl -p

Install Docker
sudo apt-get install docker -y

Install Docker-Compose
sudo apt-get install docker-compose -y

What is Docker Compose?
Compose is a tool for defining and running multi-container Docker applications. With Compose, you use a YAML file to configure your application’s services. Then, with a single command, you create and start all the services from your configuration.
 
The purpose of docker-compose is to function as docker cli but to issue multiple commands much more quickly. To make use of docker-compose, you need to encode the commands you were running before into a docker-compose.yml file
 
Run docker-compose up and Compose starts and runs your entire app.

Create docker-compose.yml
this yml has all configuration for installing both SonarQube and Postgresql:
sudo vi docker-compose.yml 

(Copy the below code high-lighted in yellow color)
version: "3"

services:
  sonarqube:
    image: sonarqube:lts-community
    container_name: sonarqube
    restart: unless-stopped
    environment:
      - SONARQUBE_JDBC_USERNAME=sonar
      - SONARQUBE_JDBC_PASSWORD=password123
      - SONARQUBE_JDBC_URL=jdbc:postgresql://db:5432/sonarqube
    ports:
      - "9000:9000"
      - "9092:9092"
    volumes:
      - sonarqube_conf:/opt/sonarqube/conf
      - sonarqube_data:/opt/sonarqube/data
      - sonarqube_extensions:/opt/sonarqube/extensions
      - sonarqube_bundled-plugins:/opt/sonarqube/lib/bundled-plugins

  db:
    image: postgres:12
    container_name: db
    restart: unless-stopped
    environment:
      - POSTGRES_USER=sonar
      - POSTGRES_PASSWORD=password123
      - POSTGRES_DB=sonarqube
    volumes:
      - sonarqube_db:/var/lib/postgresql10
      - postgresql_data:/var/lib/postgresql10/data

volumes:
  postgresql_data:
  sonarqube_bundled-plugins:
  sonarqube_conf:
  sonarqube_data:
  sonarqube_db:
  sonarqube_extensions:

Save the file by entering :wq!

Now execute the compose file using Docker compose command:
sudo docker-compose up -d 


If you are getting any errors like this, make sure you exit below commands to adding Docker group to current user.

sudo usermod -aG docker $USER

Make sure SonarQube is up and running
sudo docker-compose logs --follow



Once you see the message, that's it. SonarQube is been installed successfully. press control C and enter.
Now access sonarQube UI by going to browser and enter public dns name with port 9000

Please follow steps for integrating SonarQube with Jenkins
https://www.coachdevops.com/2020/04/how-to-integrate-sonarqube-with-jenkins.html

Jenkins Terraform Integration | How do you integrate Terraform with Jenkins | Automate Infrastructure setup using Terraform and Jenkins | Remote Store in S3 Bucket

We will be learning how to provision resources in AWS cloud using Terraform and Jenkins. We will also learn how to store terraform state info remotely in AWS S3 bucket.
We will create S3 bucket for storing terraform state info and Dynamo DB table for locking capability. 

We will try to create an EC2 instance and S3 Bucket using Terraform and Jenkins in AWS cloud. Look at the diagram that describes the whole flow. 

Watch these steps in action in YouTube channel:


Pre-requisites:
  • Create S3 bucket for storing TF state
  • Create dynamo DB table for providing lock capability
  • Jenkins is up and running
  • Terraform is installed in Jenkins
  • Terraform files already created in your SCM
  • Make sure you have necessary IAM role created with right policy and attached to Jenkins EC2 instance. see below for the steps to create IAM role.
I have provided my public repo as an example which you can use.

Step # 1 - Create S3 Bucket:
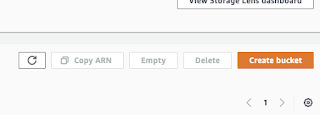
Login to AWS, S3. Click on create S3 bucket.

Give unique name to the bucket, name needs to be unique.

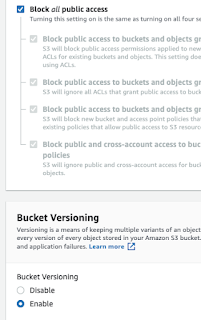
Block all public access, enable bucket versioning as well.

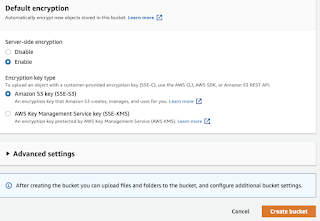
Enable encryption.


Step # 2 - Create DynamoDB Table
Create a new table with LockID as partition Key


Step - 3 Create IAM role to provision EC2 instance in AWS 


Select AWS service, EC2, Click on Next Permissions


Type EC2 and choose AmazonEC2FullAccess as policy and type S3 and add AmazonS3FullAccess, type Dynamo

Attach three policies


Click on Next tags, Next Review
give some role name and click on Create role.


Step 4 - Assign IAM role to EC2 instance

Go back to Jenkins EC2 instance, click on EC2 instance, Security, Modify IAM role


Type your IAM role name my-ec2-terraform-role and Save to attach that role to EC2 instance.


Step 5 - Create a new Jenkins Pipeline

Give a name to the pipeline you are creating.


Step 6 - Add parameters to the pipeline

Click checkbox - This project is parameterized, choose Choice Parameter


Enter name as action
type apply and enter and type destroy as choices as it is shown below(it should be in two lines)


Go to Pipeline section

Add below pipeline code and modify per your GitHub repo configuration.

pipeline {
    agent any

    stages {
        stage('Checkout') {
            steps {
            checkout scm
            }
        }
        
        stage ("terraform init") {
            steps {
                sh ('terraform init -reconfigure') 
            }
        }
        stage ("terraform plan") {
            steps {
                sh ('terraform plan') 
            }
        }
                
        stage ("terraform Action") {
            steps {
                echo "Terraform action is --> ${action}"
                sh ('terraform ${action} --auto-approve') 
           }
        }
    }
}
Click on Build with Parameters and choose apply to build the infrastructure or choose destroy if you like to destroy the infrastructure you have built. 


Click on Build With Parameters,
choose apply from the dropdown
Now you should see the console output if you choose apply.


Pipeline will look like below:


Login to AWS console


Login to S3 Bucket, you should see terraform state info is also added


How to Destroy all the resources created using Terraform?

run the Jenkins Pipeline with destroy option. This should destroy all the resources you have created using Terraform.

Azure DevOps Terraform Integration | How do you integrate Terraform with Azure DevOps | Automate Infrastructure setup using Terraform and Azure DevOps | Remote Store in S3 Bucket

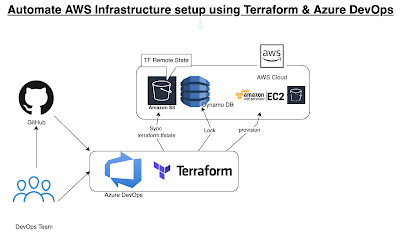
We will be learning an interesting use case to provision resources in AWS cloud using Terraform and Azure DevOps. We will also learn how to store terraform state info remotely in AWS S3 bucket.

We will create S3 bucket for storing terraform state info and Dynamo DB table for providing state lock capability. 

We will try to create an EC2 instance and S3 Bucket using Terraform and Azure DevOps in AWS cloud. Look at the diagram that describes the whole flow. 


Watch the steps in YouTube channel:
    Pre-requistes:
    • Azure DevOps organization
    • Add Azure pipelines Terraform tasks 
    • Create AWS service connection in Azure DevOps for Terraform to use
    • Create service connection for connecting to GitHub
    • Create S3 bucket for storing TF state
    • Create dynamo DB table for providing lock capability
    • I have provided my public repo as an example which you can use.

    Step # 1 - Create S3 Bucket:
    Login to AWS, S3. Click on create S3 bucket.

    Give unique name to the bucket, name needs to be unique.

    Block all public access, enable bucket versioning as well.

    Enable encryption.


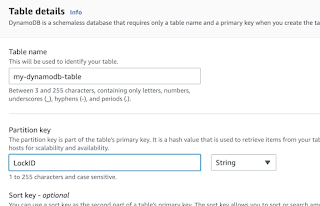
    Step # 2 - Create DynamoDB Table
    Create a new table with LockID as partition Key


    Step # 3 - Create Service connection to connect to AWS from Azure DevOps
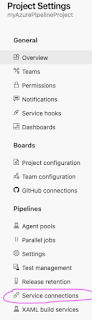
    Go to Azure Devops, select your project. Project Settings

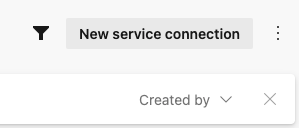
    Click Service Connections


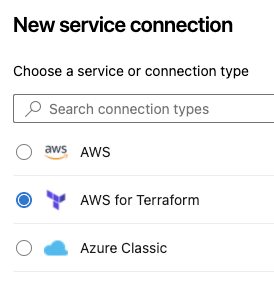
    Select AWS for Terraform
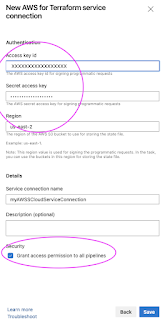
    Enter Access Key, Secret Key and region code, enter name for service connection and choose Grant Access to all pipelines.


    Click Save.

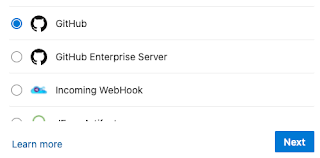
    Create Service connection for connecting to GitHub

    Save

    Step 4 - Create a new Release Pipeline
    Click on Releases, New, choose New Release pipeline


    Select empty job. 

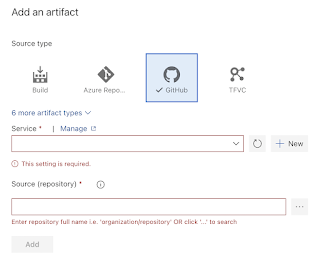
    Click on Add Artifacts


    Choose GitHub, select Github service connection, select the repo


    Click on Add tasks, type terraform
    choose the task


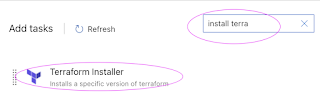
    Add task, search for install terraform and select installer task

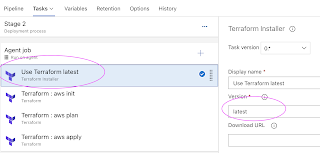
    It should show something like this:
    Add another terraform task for init

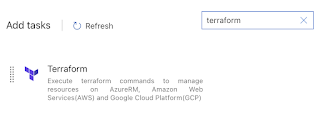
    Search for terraform and add task

    select AWS from drop down, choose init as command and add -reconfigure as additional command arguments. Select AWS service connection and enter bucket name


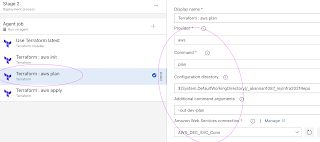
    Add another task for plan, select right values.
    enter -out dev-plan 


    Add another task by cloning for apply.
    enter "dev-plan" as additional arguments


    Click on Save. 
    Create Release, now job should be running.


    Login to AWS--> S3 Bucket, you should see terraform state info 


    How to destroy all the resources created using Terraform?

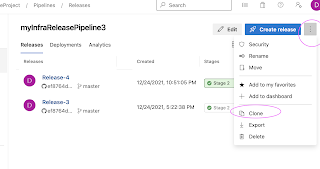
    Clone the current infra setup release pipeline.

    Modify the pipeline name.

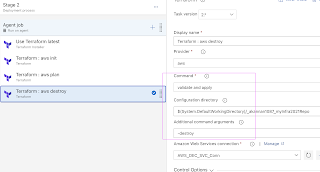
    Add 
    Modify the apply task to as shown in the diagram
    enter -destroy as additional argument.


    Click on Create Release to make sure all the resources are destroyed.

    Friday, December 3, 2021

    DevOps Coaching Program Model Information | AWS Cloud Azure Cloud DevOps Coaching Program Model Information

    Thanks for showing interest in learning DevOps. Believe it or not, anyone can become a successful DevOps engineer after finishing the exciting training with coach in person at Frisco, TX (currently doing only online due to covid-19)


    You really don't need to a have solid programming or software engineering experience. Many of my students did not have any computer background before attending the coaching program, now they are very successful DevOps engineers, making 6-figure income working at various companies across USA.

    What is DevOps?

    DevOps is #1 IT skills right now in the market and will be there for really long time. As a DevOps engineers/consultant you will help companies to release software products faster, automated and efficient ways.

    DevOps brings together people, processes, and technology, automating software delivery to provide continuous value to end users. DevOps automates and speeds software delivery. It makes your process and your products more reliable.

    Here is the coaching model:
    • total 9 weeks of coaching
    • 2 sessions per weekend/week
    • Fast paced
    • Purely lab oriented(hands on)
    • ~80% hands on, ~20 %theory
    • 40+ lab exercises, also few bonus lab exercises
    • Wiki page for troubleshooting needs
    • Collaborative way of learning - separate WhatsApp group per batch
    • Coach’s website(www.cidevops.com & www.coachdevops.com) also has instructions
    • YouTube channel
    • Help in resume preparation
    • Help in Interview preparation
    • Interview Coaching & tips
    • DevOps concepts and interview notes will be provided
    About the DevOps Coach:
    • 23 yrs of IT experience, 9+ Yrs in practicing DevOps and Cloud Automation.
    • Comprehensive hands on knowledge on Git, BitBucket, GitHub, Jenkins, Maven, SonarQube, Nexus, Terraform, Ansible, Docker and Kubernetes on AWS and Azure cloud platforms.
    • Many students already placed in reputed companies from my coaching program successfully.
    • Working as a Sr.DevOps Coach/Architect in a top IT services company in US.
    • Unique program...less theory, more hands on work on AWS and Azure 
    • Resume preparation will be done with candidates personally.
    • One-to-one Interview coaching.
    • Coaching is purely hands on with job relevant.
    • Coached about 990+ people successfully.
    Just believe!! Anything is possible!!