We will learn how to automate Docker builds using Jenkins. We will use
Python based application. I have already created a repo with source code
+ Dockerfile. We will see how to create Docker image and upload into AWS ECR successfully.
- Automating builds
- Automating Docker image creation
- Automating Docker image upload into AWS ECR
- Automating Docker container provisioning
Pre-requisites:
1. Jenkins is up and running
2. Docker installed on Jenkins instance
3. Docker and Docker pipelines plug-in are installed and Amazon ECR plug-in installed
4. Repo created in ECR, Click here to know how to do that.
5. port 8096 is opened up in firewall rules.
6. Access keys + secret keys from AWS account
Step # 1 - Add ECR Plug-in
Go to Jenkins, Manage Jenkins, Add Amazon ECR plug-in

Step #2 - Create Credentials for AWS ECR
Go to your Jenkins where you have installed Docker as well.
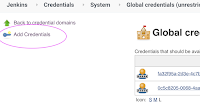
Go to credentials -->

Click on Global credentials

Choose AWS credentials


Step # 3 - Create a scripted pipeline in Jenkins, name can be anything

Step # 4 - Copy the pipeline code from below
Make sure you change red highlighted values below:
Your account_d should be updated and repo should be updated.
your registry credentials ID from Jenkins from step # 1 should be copied
pipeline {
agent any
environment {
registry = "account_id.dkr.ecr.us-east-2.amazonaws.com/myphpapp"
//- update your credentials ID after creating credentials for connecting to Docker Hub
registryCredential = 'Copy_ID_from_step_no_1_above'
dockerImage = ''
}
stages {
stage('Cloning Git') {
steps {
checkout([$class: 'GitSCM', branches: [[name: '*/master']], doGenerateSubmoduleConfigurations: false, extensions: [], submoduleCfg: [], userRemoteConfigs: [[credentialsId: '', url: 'https://github.com/akannan1087/myPythonDockerRepo']]])
}
}
// Building Docker images
stage('Building image') {
steps{
script {
dockerImage = docker.build registry
docker.build('myphpapp')
}
}
}
// Uploading Docker images into Docker Hub
stage('Upload Image to ECR') {
steps{
script {
docker.withRegistry( 'https://account_id.dkr.ecr.us-east-2.amazonaws.com', "ecr:us-east-2:$registryCredential" ) {
docker.image("myphpapp"). push('latest')
}
}
}
}
// Stopping Docker containers for cleaner Docker run
stage('stop previous containers') {
steps {
sh 'docker ps -f name=mypythonContainer -q | xargs --no-run-if-empty docker container stop'
sh 'docker container ls -a -fname=mypythonContainer -q | xargs -r docker container rm'
}
}
// Running Docker container, make sure port 8096 is opened in
stage('Docker Run') {
steps{
script {
dockerImage.run("-p 8096:5000 --rm --name mypythonContainer")
}
}
}
}
}


- Automating builds
- Automating Docker image creation
- Automating Docker image upload into AWS ECR
- Automating Docker container provisioning
Pre-requisites:
1. Jenkins is up and running
2. Docker installed on Jenkins instance
3. Docker and Docker pipelines plug-in are installed and Amazon ECR plug-in installed
4. Repo created in ECR, Click here to know how to do that.
5. port 8096 is opened up in firewall rules.
6. Access keys + secret keys from AWS account
Step # 1 - Add ECR Plug-in
Go to Jenkins, Manage Jenkins, Add Amazon ECR plug-in

Step #2 - Create Credentials for AWS ECR
Go to your Jenkins where you have installed Docker as well.
Go to credentials -->

Click on Global credentials

Click on Add Credentials

Choose AWS credentials

Add your AWS access keys and secret keys and save it

Note down the ID after saving.

Step # 4 - Copy the pipeline code from below
Make sure you change red highlighted values below:
Your account_d should be updated and repo should be updated.
your registry credentials ID from Jenkins from step # 1 should be copied
pipeline {
agent any
environment {
registry = "account_id.dkr.ecr.us-east-2.amazonaws.com/myphpapp"
//- update your credentials ID after creating credentials for connecting to Docker Hub
registryCredential = 'Copy_ID_from_step_no_1_above'
dockerImage = ''
}
stages {
stage('Cloning Git') {
steps {
checkout([$class: 'GitSCM', branches: [[name: '*/master']], doGenerateSubmoduleConfigurations: false, extensions: [], submoduleCfg: [], userRemoteConfigs: [[credentialsId: '', url: 'https://github.com/akannan1087/myPythonDockerRepo']]])
}
}
// Building Docker images
stage('Building image') {
steps{
script {
dockerImage = docker.build registry
docker.build('myphpapp')
}
}
}
// Uploading Docker images into Docker Hub
stage('Upload Image to ECR') {
steps{
script {
docker.withRegistry( 'https://account_id.dkr.ecr.us-east-2.amazonaws.com', "ecr:us-east-2:$registryCredential" ) {
docker.image("myphpapp"). push('latest')
}
}
}
}
// Stopping Docker containers for cleaner Docker run
stage('stop previous containers') {
steps {
sh 'docker ps -f name=mypythonContainer -q | xargs --no-run-if-empty docker container stop'
sh 'docker container ls -a -fname=mypythonContainer -q | xargs -r docker container rm'
}
}
// Running Docker container, make sure port 8096 is opened in
stage('Docker Run') {
steps{
script {
dockerImage.run("-p 8096:5000 --rm --name mypythonContainer")
}
}
}
}
}
Step # 5 - Click on Build - Build the pipeline
Once you create the pipeline and changes values per your ECR account id and credentials ID, click on Build now.

Steps # 6 - Check Docker images are uploaded into ECR
Login to ECR, click on your repo, now you should image got uploaded.

Steps # 7 - Access PHP App
Once build is successful, go to browser and enter http://public_dns_name:8096
You should see page like below:


9810296B4B
ReplyDeletekiralık hacker
hacker arıyorum
kiralık hacker
hacker arıyorum
belek
476ABD6809
ReplyDeleteGörüntülü Seks
Görüntülü Show
Whatsapp Ücretli Şov
Automating Docker builds using Jenkins is a powerful approach for improving DevOps workflows, continuous integration, and deployment efficiency. This article explains the automation process clearly and highlights how containerization combined with CI/CD pipelines can streamline modern software delivery systems. Readers interested in scalable infrastructure and deployment technologies can also explore Cloud Computing Projects for innovative ideas related to distributed computing and automation platforms.
ReplyDeleteModern DevOps practices increasingly rely on tools like Jenkins and Docker to simplify application deployment, testing, and environment management across cloud-based systems. Automation pipelines help reduce manual effort while improving consistency, scalability, and release speed in software engineering workflows. Those exploring advanced development and infrastructure automation concepts may also find Web Development Projects useful for understanding modern application deployment and full-stack integration techniques.
ReplyDelete