Support for password authentication was removed on August 13, 2021
Create Personal Access Token in GitHub
Go to GitHub.com--> Settings


Now copy the token and use this as password.

This is one of the common DevOps interview questions. What is the
difference between Ansible and Terraform? When will you choose Ansible over Terraform?
| Factor | Ansible | Terraform |
|---|---|---|
| Type | Configuration mgmt |
Provisioning |
| Infrastructure | mutable | Immutable |
| Language | Procedural | Declarative |
| Written in | Python | Go |
| Architecture | client only |
client only |
| State Management |
No |
Yes |
| Cloud |
All |
All |
| Syntax | YAML |
JSON |
| UI/CLI | Has both UI(Ansible Tower) and CLI |
only CLI based |
We will be learning how to execute Terraform scripts automatically using Jenkins pipeline. We will create EC2 instance using Terraform and Jenkins in AWS cloud.


We will see how to connect to GitHub from Jenkins using SSH keys instead of using user name and password. It is also a good practice to use SSH keys in Jenkins jobs instead of using user name and password.

Pre-requistes:
Create SSH keys in your Jenkins EC2 instance


Hashicorp's Terraform is an open-source tool for provisioning and managing cloud infrastructure. Terraform can provision resources on any cloud platform.

Terraform allows you to create infrastructure in configuration files(tf files) that describe the topology of cloud resources. These resources include virtual machines, storage accounts, and networking interfaces. The Terraform CLI provides a simple mechanism to deploy and version the configuration files to Azure.
Terraform can authenticate with Azure in many ways, in this example we will use Azure CLI to authenticate with Azure and then we will create resources using Terraform.
Pre-requisites:
Azure CLI needs to be installed.
Terraform needs to be installed.
Login to the Azure CLI using:
az login
The above command will open the browser and will ask your Microsoft account details. Once you logged in, you can see the account info by executing below command:
az account list
Now create a directory to store Terraform files.
mkdir tf-acr
cd tf-acr
Let's create a terraform file to use azure provider. To configure Terraform to use the Default Subscription defined in the Azure CLI, use the below cod.
Now initialize the working directory
sudo vi create-acr.tf
Perform the below command to initialize the directory.
terraform init
Once directory is initialized, you can start writing code for setting up the infrastructure. Now Perform the below command to validate terraform files.
terraform validate

terraform plan

terraform apply
Do you want to perform these actions?
type yes

Now Login into Azure Cloud to see the resources created.


One of the things that Terraform does (and does really well) is “tracks” your infrastructure that you provision. It does this through the means ofstate.
By default, Terraform stores state locally in a file named terraform.tfstate. This does not work well in a team environment where if any developer wants to make a change he needs to make sure nobody else is updating terraform in the same time.

Why state file should not be stored in your local machine?
We will learn how to store state file in AWS S3 bucket. We will be creating S3 bucket and also create Dynamo Table where we will be storing lock.
Watch the steps in YouTube Channel:
Pre-requistes:
Steps:
mkdir project-terraform
cd project-terraform
First let us create necessary terraform files.
Create tf files
sudo vi variables.tf
variable "region" {
default = "us-east-2"
}
variable "instance_type" {
default = "t2.micro"
}
sudo vi main.tf
provider "aws" {
region = "${var.region}"
}
#1 -this will create a S3 bucket in AWS
resource "aws_s3_bucket" "terraform_state_s3" {
bucket = "terraform-coachdevops-state"
force_destroy = true
# Enable versioning to see full revision history of our state files
versioning {
enabled = true
}
# Enable server-side encryption by default
server_side_encryption_configuration {
rule {
apply_server_side_encryption_by_default {
sse_algorithm = "AES256"
}
}
}
}
# 2 - this Creates Dynamo Table
resource "aws_dynamodb_table" "terraform_locks" {
name = "tf-up-and-run-locks"
billing_mode = "PAY_PER_REQUEST"
hash_key = "LockID"
attribute {
name = "LockID"
type = "S"
}
}
now let us initialize terraform.
terraform init

terraform apply

this will create two resources - S3 bucket and AWS Dynamo table. But still terraform state file is stored locally. if you type below command, you will see the tfstate file locally.
ls -al

To store state file remotely, you need to add following code with terraform block. This will add backend configuration.
sudo vi main.tf
#Step 3 - Creates S3 backend
terraform {
backend "s3" {
#Replace this with your bucket name!
bucket = "terraform-coachdevops-state"
key = "dc/s3/terraform.tfstate"
region = "us-east-2"
#Replace this with your DynamoDB table name!
dynamodb_table = "tf-up-and-run-locks"
encrypt = true
}
}
terraform init
and then type yes and enter. Now you see local state file has 0 bytes(empty)


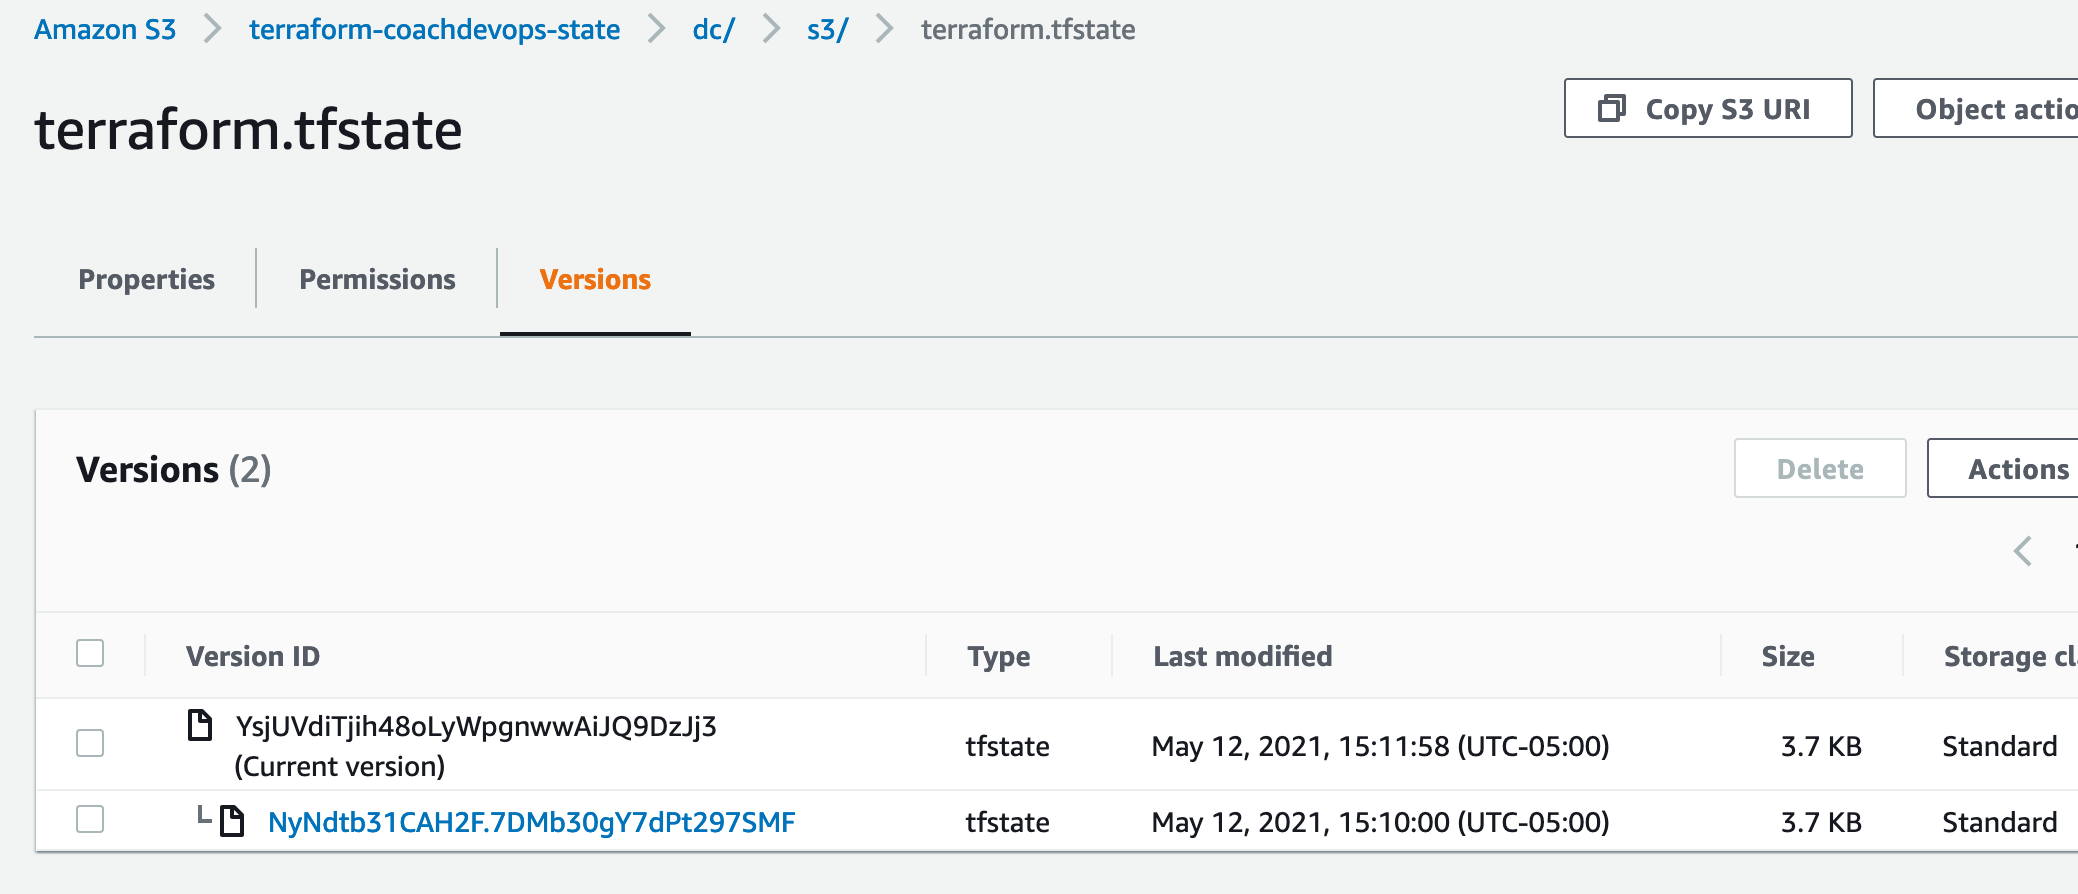
Now you should be able to see tfstate file in S3.

Click on the terraform.tfstate file, you can see multiple version of your state file. Terraform is automatically pushing and pulling state data to and from S3.
How to perform Destroy?
It is not that straight forward as back end is referencing S3 bucket, if we delete S3 bucket, back end will not where to reference. So we need to perform below steps to perform destroy:
1. remove back end reference in the main.tf by commenting out backend section of the code.
sudo vi main.tf
remove the below code or comment out:
/*
terraform {
backend "s3" {
#Replace this with your bucket name!
bucket = "terraform-coachdevops-state"
key = "dc/s3/terraform.tfstate"
region = "us-east-2"
#Replace this with your DynamoDB table name!
dynamodb_table = "tf-up-and-run-locks"
encrypt = true
}
}
*/
We need to initialize again. so type below command
terraform init -migrate-state
type yes
Now you will see the local state file have been updated.
Now perform you can delete all the resources created by Terraform including S3 bucket and Dynamo table.
terraform destroy


